Coconut-Crusted Chicken Salad with Pan Fire-Roasted Vegetables and Peanut-Honey-Lime Dressing

2 Apr

After a year and a half hiatus, I’m back at it (well, sort of!). This blog is purely a hobby for me, and when I transitioned jobs a year and a half ago, I found that I really didn’t have time to photograph, document and post anymore, especially in the day light (my main challenge to this blog has been being able to photograph all my food in natural light, since I don’t have any other equipment to make night shooting possible). Anyway, I had the urge to share this recipe and thought that there’s no harm in getting back into blogging, although I do want to give a disclaimer that I have no idea how often I’ll be posting. I don’t want my hobby to become a chore – I just want to be able to share good recipes when I can!

Coconut-Crusted Chicken Salad

There were a few inspirations for this recipe – trying to eat healthier since it’s getting warm out and my winter hibernation is finally ending :-) and trying to eat more vegetables (inspired by this article I was reading today about how much it can cut your risk of death!). I figure it can’t do much harm to eat more fruits and vegetables, so I might as well try! This recipe counts for at least a few servings I think!

I tend to like heartier salads when I’m eating healthy – otherwise I’ll be hungry an hour or two later! That’s why I combined coconut-crusted chicken with a fire-roasted vegetable mix, which was inspired by the one on Panera’s Thai Chicken salad (my favorite!). It’s a nice, charred mixture of diced carrot, bell pepper and edamame, which adds great flavor, texture and body to the salad. The cucumbers add a nice fresh crunch and the almonds are sweet and crunchy as well. You could easily substitute chopped peanuts to make this even more “Thai”.

A few recipe notes – the coconut I used is unsweetened flaked coconut. I found mine from Whole Foods and it worked well as it was very small flakes that adhered easily to the chicken. I suggest checking the health food/organic aisle of your grocery store to find unsweetened coconut. Also, the quantities of cucumber, sliced almonds and lettuce are merely suggestions, as it is truly personal preference.

This dressing is worth making extra of – it’s super flavorful and versatile. Much better than anything you can get in a bottle!  For more tips on making homemade vinaigrettes and dressings can be found here.

Coconut Chicken Salad 2


  • Servings: 2 dinner salads
  • Difficulty: Easy
  • Print

Coconut-Crusted Chicken Salad with Pan Fire-Roasted Vegetables and Peanut-Honey-Lime Dressing

Chicken:

  • 2 medium chicken breasts or breast tenderloins (~1 lb)
  • ¼ cup unsweetened flaked coconut
  • ¾ cup panko breadcrumbs
  • 1 egg
  • Vegetable oil

Cut chicken breasts lengthwise into strips (4-5 per breast). Whisk egg in a small bowl with a splash of water. Combine panko, coconut and salt (~1/2 t.) in a separate bowl. Coat chicken in egg, removing excess, then coat thoroughly in breadcrumb mixture. Meanwhile, heat several tablespoons of oil in a large skillet over medium heat. Cook chicken several minutes per side, until golden brown and chicken is cooked through (165°F).

Dressing:

  • 1 T. creamy peanut butter
  • 3 T. rice vinegar
  • 3 T. lime olive oil (or regular – see notes below)
  • 2 t. honey
  • 1 t. fresh lime juice
  • Salt and pepper to taste

Combine all ingredients in a Tupperware or Mason jar and shake vigorously to combine. Alternatively, whisk together in a small bowl. If you do not have lime olive oil, you can substitute regular extra-virgin olive oil and use more lime juice in place of the rice vinegar (lime zest could be added for extra lime flavor).

Pan fire-roasted vegetable mix

  • 1 large carrot, diced
  • ½ red bell pepper, diced
  • ½ to ¾ cup frozen shelled edamame
  • 2 T. vegetable oil

Salad:

  • Mediterranean or romaine salad mix (about 4 cups)
  • Honey roasted sliced almonds (or chopped peanuts)
  • 4-5” English cucumber, sliced

Place diced carrot and frozen edamame in a microwave-safe bowl and add a few tablespoons water. Microwave on high ~2 minutes to thaw edamame and slightly cook carrot. Drain. Heat oil in a small skillet over high heat; add edamame, carrot and pepper and stir fry until lightly cooked and slightly blackened.

Assemble salad with cucumber, charred vegetable mix, chicken, slivered almonds and drizzle with dressing.

Coconut Chicken Salad 1


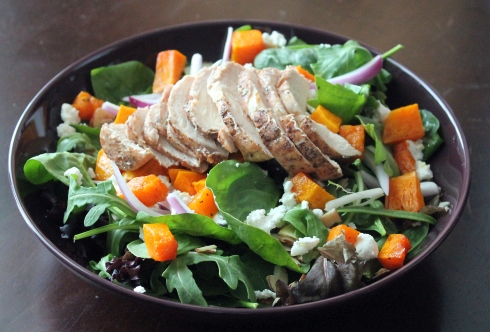
Chicken, Squash and Goat Cheese Salad

2 Jul

Hello everyone!  Hopefully everyone is enjoying their summer so far.  Our summer is going quickly – it seems like we are traveling every weekend – but at least it’s for fun reasons!  Meanwhile I am also in transition with my job and will be starting a new job next week!  Very exciting, but it’s also keeping me very busy.  For that reason, I haven’t been able to dedicate as much time to this blog, which I apologize for.  Hopefully once things settle down again I’ll have more time… until then, I’m trying to simplify my life and only post things that I think are really post-worthy.

The recipe I want to share this week is for a healthy and hearty salad.  In the summer I crave salad for dinner a lot, but I also don’t want to end up hungry just an hour or two after dinner, so I need to find ways to make them feel more like a complete meal.  This salad definitely fits the bill, and would even be great in the fall or winter.  The roasted squash really adds a more hearty, creamy element, and the tangy goat cheese gives it lots of flavor.  Combined with some moist chicken (ahh so much better homemade than the stuff they put on salads at restaurants) and crunchy almonds, this salad is definitely satisfying.

I hope you enjoy!  And let me know if you have any questions!

Chicken, Squash and Goat Cheese Salad

Time: 40 minutes; Yield: 2 large salads

  • 1/2 whole butternut squash (or roast the whole thing and use the leftovers for another meal!)
  • 1 large or 2 medium chicken breasts
  • Extra virgin olive oil (to coat squash)
  • Balsamic vinegar (few tablespoons)
  • Salt and pepper
  • 1/8 teaspoon dried sage
  • 1/4 red onion, thinly sliced
  • Roasted sliced almonds (the store-bought kind or toast your own)
  • 5 ounces (or 1 bag) arugula/spring mix
  • 3 ounces plain goat cheese, crumbled
  • Balsamic vinaigrette, see recipe below.

Preheat oven to 400°F.  Toss chicken breasts with some balsamic vinegar (a tablespoon or two, just to quickly marinate) plus salt and pepper.

To prep squash, peel with a vegetable peeler and slice lengthwise.  Scoop out seeds, then cut into a small dice (~1/2″ cubes).  The smaller the dice, the quicker it will cook, so keep it small if you’re in a time crunch.  Toss with enough olive oil to coat, salt, pepper and sage.  Place on a baking sheet.

Place chicken in a baking dish.  Roast chicken and squash for ~35 minutes, or until squash is tender and chicken reaches 165ºF internal temperature.

Let chicken rest for 5-10 minutes before slicing.  Slice against the grain, as thinly as possible.
To assemble salads, divide arugula or spring mix between two plates.  Top with red onion, almonds, crumbled goat cheese, squash and chicken.  Drizzle with balsamic vinaigrette.

Basic Balsamic Vinaigrette Dressing – for more on making your own vinaigrettes, check out my post on them here.

  • 1/4 cup balsamic vinegar of your choice
  • 1/2 teaspoon salt
  • Fresh ground pepper
  • 1 teaspoon Dijon mustard
  • 1/2 teaspoon honey (or sugar, optional)
  • 1/2 cup extra virgin olive oil

Combine all ingredients in a container with a lid and shake to combine.  Alternatively, whisk all ingredients except for oil together, then slowly stream in oil while whisking constantly.  Store any leftovers in the fridge.

Greek Burgers with Homemade Tzatziki

17 Jun

Today’s recipe is for Greek burgers with homemade tzatziki and pickled red onions.  Tzatziki is a yogurt-cucumber sauce that is tangy, crunchy and refreshing – the perfect compliment for the flavorful, spiced burgers.  I make my Greek burgers using a combination of turkey and lamb.  I like this because the lamb lends lots of flavor (truly giving it the “Greek” taste), whereas the turkey is leaner.  Turkey without lamb = lack of flavor; lamb without turkey = too fatty for my liking.  Of course, this is easily customizable and feel free to mix it up with any combination or turkey or lamb or even beef.

I served my burgers on homemade pita bread buns.  Yes, I was ambitious and made my own pita bread, but I wasn’t completely thrilled with the outcome.  They were delicious homemade rolls, but they weren’t particularly pita-ish… I still have yet to figure out the secret to making great homemade pita (and should maybe try a different recipe next time) – if anyone has any recommendations, I’d definitely love to hear them in the comments section!  While I made my own pita bread, I definitely think that store bought pita pockets would work perfectly as a carrier for these burgers, so don’t feel any pressure to make them from scratch!

Hopefully everyone is also noticing the lovely platter I served my burgers on.  The platter is a homemade pottery creation of my talented aunt, Donna Finney, owner of D.F.K. DESIGN.  From her Etsy site: “D.F.K. DESIGN offers hand-crafted pottery & bags imbued with the heart and soul of one who loves to create special pieces for everyday use. Each piece that I create is a unique item, whether thrown on the wheel, hand-built, sewn or hand-painted….each piece is one of kind. Surrounding yourself with items made with creativity, warmth and a bit of soul can have the power to change your home, your meals and your routine activities into something special.”

I definitely would encourage you to check out her Etsy site to see all the great things posted for sale there.  My favorite thing about these pottery pieces is that they are 1) beautiful (duh), 2) microwave safe, 3) dishwasher safe!! and 4) customizable.   They are as easy to use as my normal serveware in terms of care, but are extra special and beautiful.  If you have a special pattern or color or design in mind, she can customize to that (the platter below was custom).  These herb garden markers are so cute and would make a great gift.  I also love the size and color of these small appetizer plates.   Check back often as the stock changes periodically; and to keep up with new updates, check out her Facebook page.

Greek Burgers on Pita Bread with Homemade Tzatziki

Yield: 4 large burgers

Burgers:

  • 1 lb ground turkey
  • 1 lb ground lamb
  • 2 ounces feta
  • 1/2 teaspoon cumin
  • 1 teaspoon dried oregano
  • 1 tablespoon Worcestershire sauce
  • salt and pepper

Cucumber Tzatziki Sauce:

  • 1/2 cucumber, peeled and thinly sliced
  • 1 sprig fresh mint, chopped (about 10 leaves)
  • 1/2 teaspoon salt
  • 2 teaspoons fresh lemon juice
  • 3/4 cup plain Greek yogurt (1 container)

Pickled Red Onions:

  • 1/2 red onion, thinly sliced
  • 2 tablespoons red wine vinegar
  • 1/2 teaspoon salt

To Serve:

  • Pita bread
  • Sliced black olives, lettuce, tomato or extra mint leaves, all optional

Combine ingredients for cucumber tzatziki.  In a separate bowl, combine ingredients for pickled red onions.  The longer these two topping dishes can sit to “marinate”, the better.

Meanwhile, gently combine all ingredients for the burgers and form 4 patties.  The secret to extra tender and juicy burgers is just barely mixing the meat – be gentle and don’t over combine.

Grill until a meat thermometer registers 165ºF internal temperature or until cooked through.

To serve, place burgers on halved pita bread and top with cucumber sauce, pickled red onions, and any other toppings you want!

The Best Lemon Coconut Cupcakes of Your Life

3 Jun

…… or (an alternative title): The Best Cupcakes of your life in general.

This may sound a little extreme, but I just ate another one of these and was in heaven all over again, and I’m pretty sure you will agree (I know Matt and the rest of my family agreed!!).

Originally this was going to be a Lemon Coconut Cake creation.  That was until I was halfway through making the cake batter and could not locate any sort of round cake pans in my kitchen.  How is that possible!?  I even looked back at our wedding registry online to see if we registered for them….. nope?!  So I’m thinking what happened is that Matt and I both had sets of round cake pans in our separate apartments, and that they were probably old and gross so we got rid of them, thinking we would register for nice new ones.  And then we forgot to register for them.  Who knows?! Or else I really do have them somewhere and just couldn’t find them….

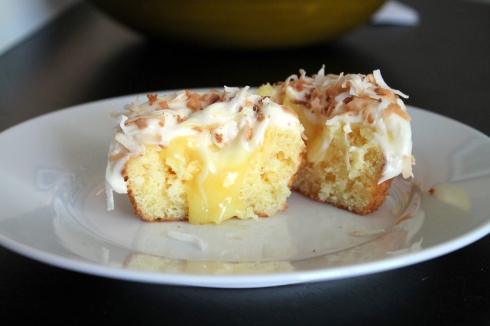
Oh well! The thing is, I think this recipe came out infinitely better as a cupcake anyway!  Instead of using the homemade lemon curd as a filling in between the layers of cake, I scooped out a bit of each cupcake and filled it with lemon curd:

Let me just say, I am mildly obsessed with lemon curd.  It’s just so sweet and tangy and creamy and tart and lemony and heavenly and … is this going too far?  I’ll eat it with a spoon.  Though a cupcake is a much better vehicle I must admit.

Anyway, the point was to make a lemon coconut cake for my mom for a belated Mothers Day celebration.  She loves lemon and loves coconut, and she definitely loved these cupcakes.  I somewhat cheated by starting with a boxed yellow cake mix (I’m going a little Sandra Lee/Semi-Homemade on you), but I made sure to jazz it up with lemon juice, sour cream and shredded coconut.

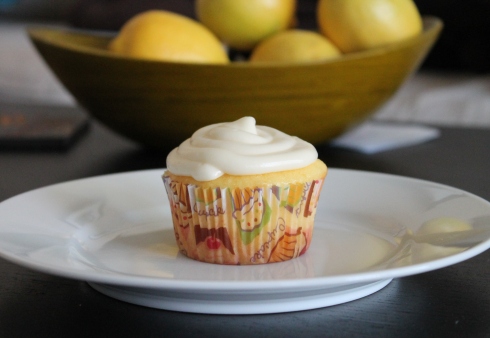
The frosting is a homemade cream cheese frosting, recipe adapted from Ina Garten, topped with shredded coconut (either toasted or not, you decide – we LOVED the toasted kind, plus it’s a bit prettier I think).

The lemon curd was also an Ina Garten recipe.  It was incredibly easy.  I didn’t make quite a full batch of it (namely because I only had 3 eggs and her recipe calls for 4, ha), but I’ll just link to her original recipe and you can adjust the batch size if you want.  A lot of lemon curd recipes call for using a double boiler-type set up, but her method was so much more simple.  Basically, mixing sugar and lemon zest and butter and eggs and lemon juice all together (it almost looked like cake batter to start), and then cooking it over low heat for just 10 minutes.  It was awesome.  And you don’t even need very many lemons, so it’s affordable too ;-)

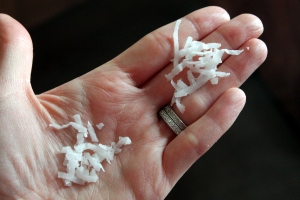
Other notes I want to mention: I pulsed the shredded coconut in a food processor before adding it to the batter. I didn’t want it to be stringy at all, like coconut can sometimes be.  This really helped and the coconut wasn’t so noticable in the cake itself.   See the difference?

Also, don’t be intimidated by the added step of scooping out some of the cake and adding lemon curd.  It was very easy to do with a spoon, and then you get to eat the leftover cake pieces and no one has to know :).

I find the easiest way to fill the cupcakes with the curd and to ice them is to put the curd and icing into ziplock baggies, cut off the corner, and pipe it in/on as if you are using a pastry bag (this saves a lot of time over spreading it with a knife, and it looks prettier).

So without further ado, a recipe that will change your life (haha, I’m so over the top about food sometimes, it’s ridiculous, I know):

Coconut Cupcakes with Lemon Curd Filling and Cream Cheese Icing

Yield: 24 cupcakes

Cake:

  • 1 yellow cake mix (I used Pillsbury Moist Supreme Classic Yellow – for reference, since other cake mixes may call for different amounts of liquid/eggs)
  • 1/3 cup oil (this is what the mix calls for)
  • 3 eggs (again, as per the box)
  • 1/2 cup sour cream
  • 1/4 cup lemon juice
  • 3/4 cup water (the box mix called for 1 cup water, so I used 1/4 lemon juice plus 3/4 water)
  • 1 cup shredded, sweetened coconut (pulsed in a food processor, optional)

Preheat the oven according to package directions.  Combine all ingredients (except coconut), according to package directions.  Stir in coconut, then scoop into cupcake pans (either sprayed with cooking spray or lined with cupcake liners), filling 2/3 full.  Bake and cool according to package.

Lemon Curd:

For the lemon curd, I used Ina Garten’s Recipe.  I adjusted the recipe to make a smaller amount, but if you make the recipe according to her directions you’ll have plenty of wonderful leftovers then.

I used a microplane zester to zest my lemons, so that elminated the need for me to pulse the lemon peel strips with the sugar as is stated in the original recipe.

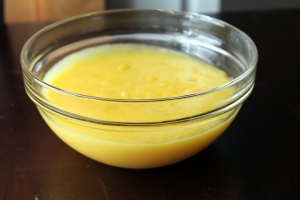
At first I was worried because the recipe seemed a little chunky and cloudy:

But as it cooked, it became clear and beautiful just like it should be.

Don’t be worried if it doesn’t seem as thick as it should be after the 10 minutes of cooking are up, because it will continue to thicken once it is cooled and refrigerated.

Cream Cheese Icing:

I again used Ina Garten’s recipe, found at the bottom of this recipe here.

I made a half batch, removed the almond extract, and made other slight adjustments so the ingredients were as follows:

  • 1/2 pound cream cheese (1 bar), at room temperature
  • 1/4 pound (1 stick) butter, at room temperature
  • 1/2 teaspoon vanilla extract
  • 1/2 pound confectioners’ sugar

Simply beat all ingredients with an electic mixer (or very strong arm) until smooth and combined.

To Assemble:

Once cupcakes are cooled, use a cookie scoop or small spoon to remove small portion of the middle of each cupcake:

Spoon cooled and thickened lemon curd into a small ziplock bag, seal, then snip one corner and pipe into the well of each cupcake.

Spoon icing into another ziplock bag and similarly cut off a corner to pipe the frosting on top of each cupcake, hiding the lemon curd inside.

Top each with shredded coconut, either toasted or not, it’s up to you! (To toast, place some coconut, about 5 ounces, in a dry saute pan on the stove.  Turn heat to medium low, tossing frequently to prevent burning.  Watch it carefully, it will toast quickly!).

If you don’t eat all the cupcakes in one sitting, store them in the refrigerator until your next binge :)

Simple Baked Tilapia, Asparagus and Potatoes

21 May

Today’s recipe is very simple, the kind of food that I crave when I crave a home-cooked meal.  There’s something about eating out at restaurants that gets tiring.  It’s fun to try new things, but constantly eating rich and fancy and indulgent meals gets old quickly for me.  Sometimes I just want something simple.  And somehow this meal satisfies my craving for a simple, square meal.

So here’s the disclaimer: this isn’t anything wild and crazy and innovative, it’s just simple and satisfying and good (and healthy).  This is the sort of thing we eat on weeknights when we’re not feeling adventurous, so feel free just to use this as inspiration, rather than a hard-and-fast recipe.

I tend to use a lot of tilapia when I cook fish, mainly because I usually buy a big bag of the individually wrapped frozen fillets and keep them in the freezer for a quick and easy weeknight meal.  But feel free to substitute any other white fish you like (or even salmon) – you will just need to adjust the baking time depending on the thickness of the fish.


Simple Baked Tilapia with Asparagus and Baby Potatoes

Yield: 2 servings; Time: 15 min. active, 15 min. inactive

  • 1 bundle asparagus, ends trimmed off
  • 3/4 lb. baby potatoes
  • 2 tilapia filets (or other white fish)
  • Extra virgin olive oil
  • Salt and pepper
  • 2 garlic cloves, minced
  • 1 lemon, zested and juiced
  • 1/8 teaspoon cayenne pepper (optional)
  • 1/2 teaspoon dried (or 1 teaspoon fresh) thyme
  • Fresh basil (optional)
  • 1 tomato, seeded and diced (optional)

Preheat the oven to 400°F.

Meanwhile, place the potatoes in a pot and fill with enough water to cover, plus a teaspoon or two of salt.  Bring to a boil over high heat and cook for ~7  minutes, depending on size.  The goal is to par-boil them, not cook them all the way (and then finish the cooking in the oven).

Coat a baking dish with a layer of olive oil or cooking spray.  Place the tilapia filets in the dish and season with salt, pepper, cayenne pepper, thyme, lemon juice, half the garlic and half the lemon zest (I seasoned one side and then flipped them over a few times to make sure they were well coated).

Remove half-cooked potatoes from the boiling water, allow to cool briefly, then cut into halves or quarters.  Toss potatoes and asparagus with a tablespoon or so of olive oil (just enough to coat), salt, pepper and remainder of minced garlic and lemon zest.  Place on a baking sheet.

Place the tilapia and potatoes/asparagus in the oven and roast for about 15 minutes (the fish will take 15-17 min depending on the thickness – it’s done when it flakes easily with a fork and is opaque all the way through; the potatoes/asparagus will take 13-15 minutes).

Serve immediately with fresh basil and/or diced tomato.  Make sure to pour any lemony liquid from the fish baking dish over top!

Not-your-Average Lentils and Rice

13 May

Yet again I find myself posting a vegetarian recipe that I swear will really satisfy even the most carnivorous meat lovers in your house, just like the Food Network Tex Mex Rice and Beans recipe I posted or this recipe for Spiced and Roasted Eggplant with Quinoa Salad.  Lentils are hearty, filling and healthy, so you don’t have to feel guilty about this dinner. I also tried to add more veggies to this recipe (like zucchini and bell pepper) to really make it a complete meal.   I calculated the approximate fat, calories protein and fiber in this recipe and I was pleasantly surprised.  This recipe has (approximately) 280 calories, 5 grams of fat, 14 grams of protein, and 6.5 grams of fiber per serving.  Compared to most other dinners I eat this is probably ranking pretty high for health!  Let’s just say I did not calculate the nutrition facts for my Mac and Cheese recipe…

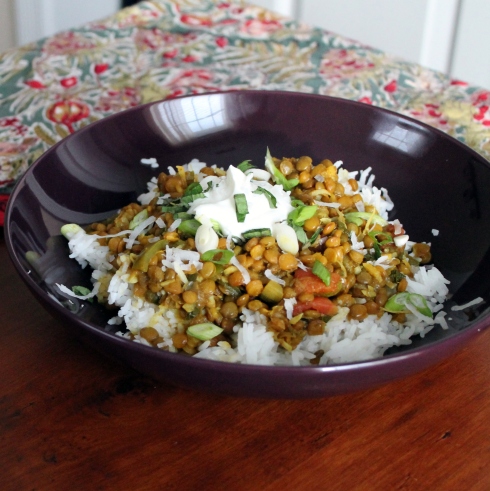
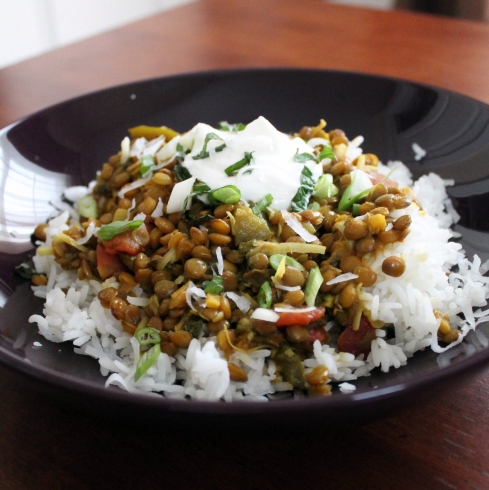
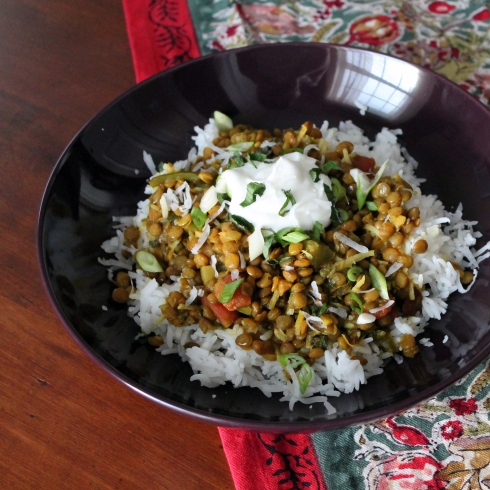
One of the best parts about this recipe, besides the fact that it’s healthy, is how satisfying it is.  I think that’s for two reasons – it has a lot of flavor and is just one of those comforting, hearty, warm and stomach-coating dishes (but without the guilt! yay!).  The flavor is a unique combination of warm and earthy turmeric and curry powder, spicy cayenne pepper (if you want), fresh ginger and garlic and scallions, sweet coconut and fresh mint (which really adds a nice refreshing element).  All together, these ingredients really help jazz up the plain lentils.  Definitely don’t skimp on the Greek yogurt for serving – it’s like a healthier and more tasty replacement for sour cream – and the coolness really helps cut through the rich, spicy stew.  Oh, and don’t skimp on the salt either (adjust according to your taste, and depending on the saltiness of your chicken broth, but if the dish is under-seasoned, all the flavors will be a little more dull, so make sure to season it enough).  So without further ado…

Not-your-Average Lentils and Rice

Time: 20 min. active, 30 min. inactive, Yield: 6 servings

  • 1 tablespoon vegetable oil
  • 1/2 green bell pepper, chopped
  • 1 small zucchini, chopped
  • 1 bunch green onions, chopped
  • 1 tablespoon minced fresh ginger
  • 3 garlic cloves, minced
  • 1/4 teaspoon crushed red pepper flakes
  • 4 cups chicken broth
  • 1 cup canned crushed or diced tomatoes + juice
  • 1.5 cups dried lentils (12 oz), rinsed and sorted
  • 1 teaspoon ground turmeric
  • 1/2 teaspoon curry powder
  • 1/2 teaspoon salt
  • 1/8 teaspoon cayenne pepper, optional
  • 6 tablespoons shredded coconut
  • 2 tablespoons fresh mint, chopped
  • 3 cups cooked rice (brown or white)
  • 2 cups plain Greek yogurt, for serving

Add oil to a large saucepan or soup pot and heat over medium heat.  Add green pepper, zucchini, green onions, ginger, garlic and red pepper flakes and cook until softened, about 5 minutes.

Stir in broth, tomatoes, lentils, turmeric, curry powder and salt.  Heat to boiling then reduce to a simmer.  Cover and cook ~30 minutes until lentils are tender (taking care not to let too much liquid evaporate – if it does, add more stock or tomato juice).  Make sure lentils are cooked through – “al dente” does not apply to lentils ;-)

Meanwhile, you should be cooking the rice… in a rice cooker if you have one – they are life changing :)  Probably because I’ve had multiple instances of burning rice to a pan on the stove (which is embarrassing).

Once tender, right before serving, stir in coconut and mint.  Serve over rice and top with a dollop of yogurt.  Proceed to watch vegetarian-food-haters convert…..

Beer Battered Lime Shrimp Tacos with Slaw

5 May

Happy Cinco de Mayo!

I am mildly obsessed with Mexican food.  Ok, not mildly.  Mexican food is my absolute favorite and I could die happy if the only thing I could eat for the rest of my life was chips and salsa and enchiladas.

Now that that’s out of my system, here is a somewhat Mexican recipe.  Haha.  I claim to be no authentic Mexican food expert, however, I tend to cook a lot of Mexican/Southwestern-inspired dishes.  I like making salsas and slaws  to serve atop everything (like this fish) and generally using a corn tortilla as a vehicle to eat pretty much anything (trivia time: did you know huevos rancheros is my favorite breakfast dish ever?! Ever since I tried this recipe, I’m a convert.  Sorry Mr. Benedict.)

This recipe came about because I wanted to come up with a way to use some of my Persian Lime olive oil (I know, oh la la), which was a gift from my fellow-foodie aunt:

Lime olive oil is definitely not a requirement of this recipe, but you may want to up the lime juice or zest in the recipe if you are as much of a lime-lover as me.  The olive oil is from D’Avolio if anyone is interested.  They have all sorts of fun flavors of olive oils and vinegars (I also have the peach white balsamic vinegar and it’s awesome in salad dressings, mmm).  So fun. 

So basically I wanted to come up with a use for my olive oil and I was in the mood for something summery and refreshing and well, Mexican.  Shrimp was a logical choice, and just to up the ante, I beer-battered them.  And shallow fried them.  In lime olive oil.  Ahhhh it was so delicious!!  And so surprisingly easy.  Did you know you can make a beer batter with just equal parts beer and flour?!  Who knew.  Well, I figured it out. And now I’m all excited to try different beer varieties and beer batter everything in sight (think about it – something like an IPA or a more fruity beer like Blue Moon would probably be awesome).  The batter will be really thick, but that means it will make a great coating.  I highly recommend trying this, because it’s awesome.  And super low-calorie.  Just kidding :-D

 When I eat something a little more gluttonous, I somehow justify it to myself by topping it with vegetables.  Specifically, broccoli slaw. 

In general, I much prefer topping tacos with slaw rather than boring old lettuce or salsa.  I think I first got this idea from Bobby Flay – long, long ago I remember making some taco recipe of his and he used cabbage slaw (or something) instead of lettuce, and it was great.  Cabbage/slaw gives a great crunch, and you can marinade it to make it really, really flavorful, almost like a salsa itself.  In this recipe I went overboard with lime juice and acid and salt and it was wonderful.  But use this recipe as an inspiration – and know that you can use any type of cabbage or slaw mix and any other type of seasonings (just always make sure to use some sort of acid and some salt to help wilt the slaw a little bit). 

Beer Battered Lime Shrimp Tacos with Slaw

Time: 20 min. active and 30 min. inactive; Yield: 2 very large portions or 3 normal-person portions

Slaw:

  • Juice of 1 lime (~2 tablespoons)
  • Zest of 1 lime
  • 2 tablespoons lime olive oil (or regular oil if you do not have lime)
  • 2 tablespoons red wine vinegar
  • 1 teaspoon salt
  • Fresh black pepper
  • 1 jalapeno, seeds removed and minced (taste a small piece to see how spicy it is – if very spicy, only use half)
  • 1 garlic clove, minced
  • 1/4 of a red onion, diced
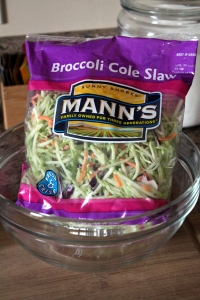
  • 6 ounces broccoli slaw mix (or any other cabbage mix you can find)
  • 6 radishes, very thinly sliced

Shrimp

  • 1/2 cup beer
  • 1/2 cup all-purpose flour
  • 1 teaspoon Old Bay Seasoning (optional)
  • Lime olive oil (or regular oil) – enough to generously coat a fry pan, about 1/3 cup
  • 1/2 pound of raw shrimp (~4-6 large shrimp per person), peeled, deveind and tails removed

+ Corn tortillas for serving (6)

+ Queso Fresco or Feta cheese for serving, optional

Combine all slaw ingredients and toss to coat slaw well.  Allow to sit for 30-40 minutes for flavors to develop and for salt and acids to draw some moisture out of the slaw.  This will help is soften slightly.

For the shrimp, stir together beer, flour and Old Bay.  The mixture will be very thick and pasty.  If too thick, add slightly more beer; if too thin, add more flour.  The mixture should easily coat and stay on the shrimp.  Meanwhile, heat a saute pan on the stove over medium/medium-high heat with enough oil to generously coat the bottom (the goal is to shallow-fry the shrimp).  Season shrimp with salt and pepper and coat in batter.  Once oil is hot (you can tell because it should start rippling slightly), place shrimp in oil.  Cook until coating has turned golden brown on the first side and shrimp is mostly cooked through (~2-3 minutes depending on size of shrimp); flip, and cook remaining side for another 30 seconds or until golden brown.  Shrimp cook very quickly, so take care not to overcook them.  When they are pink and firm they are done – so don’t keep cooking them!  Remove and place on a paper towel-lined plate to soak up excess oil.

To serve, heat up corn tortillas (in the microwave with a damp paper towel – so they get moist and flexible and don’t tear).  Serve each with plenty of shrimp, slaw and queso fresco.

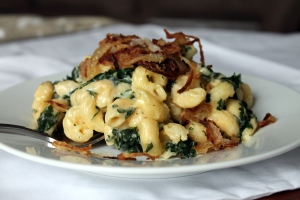
Grown-Up Mac and Cheese

29 Apr

As with take-out pizza versus homemade, there is also a time and a place for boxed mac and cheese and a time for homemade.  Is it bad to admit that I still enjoy the blue box variety?  I feel like that’s ok, since I appreciate the blue box kind for completely different reasons than a gourmet homemade version (namely nostalgia and the freedom to douse it in ketchup – which is probably gross to many people – oops).   Today’s recipe is for a “grown up” mac and cheese (with spinach and crispy fried shallots on top) – but really it’s just for a homemade variety – since the recipe is completely adaptable for all tastes and ages.

Once you know the basic process for making macaroni and cheese, the possibilities are endless.  This is a more classic version of macaroni and cheese, with cheddar and Gruyère (with spinach added to make me feel slightly less guilty about this indulgent dinner – and really, the cheese and pasta mellow out the spinachy taste – amen).  The crispy shallots (which to me are a more gourmet spin on French’s fried onions) add a lovely salty and tangy bite – don’t skip them – they really add that extra something.  But, like I said before, the possibilities are endless – you can use any combination of cheeses and/or veggies and/or meat you want (or use no veggies or meat at all!).  One of my personal favorites is using Pepper Jack cheese and tiny broccoli florets for a so-called “Mac and Jack” spicy macaroni and cheese.  Yum.

This is a quick version of macaroni and cheese, which skips any baking in the oven.  But you can certainly pour the macaroni into a baking dish, top with bread crumbs and/or cheese (and/or crispy shallots!) and bake until golden brown.  I can’t decide which method I like better – without baking, the sauce stays so luxuriously creamy and saucy; but when baked, the crunchy golden brown top is pretty delicious too.  I’m torn.

Mac and Cheese with Spinach and Crispy Shallots

Time: 25 minutes; Yield: 8 servings

  • 3 tablespoons butter
  • 3 tablespoons all-purpose flour
  • 4 cups whole milk
  • 3 cups shredded cheese (I recommend a mix of aged sharp cheddar, Gruyère and/or Jack)
  • 1 teaspoon Dijon mustard
  • 1/2 teaspoon Old Bay Seasoning
  • Few grates of fresh nutmeg
  • 8 ounces fresh spinach, chopped finely (optional)
  • 1 pound cavatappi (hollow corkscrew shaped pasta), or any other noodle you like
  • 2 large shallots, thinly sliced
  • Flour, to coat shallots
  • 4 tablespoons olive oil, or enough to generously coat a saute pan
  • Salt and pepper

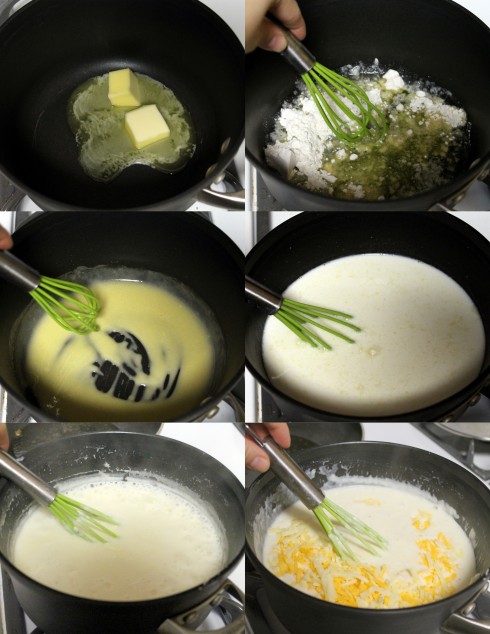
Making the Sauce: Melt the butter in a medium saucepan over medium heat, then whisk in the flour.  Cook for about 2 minutes, then add milk.  Bring to a boil (~8 min), then reduce to a simmer for 10-15 minutes or until thickened, whisking often to prevent burning.  Season with salt and pepper.  Once thickened, add the cheeses, mustard, Old Bay and nutmeg, whisking to combine.

Cooking Pasta and Spinach:  Boil pasta according to package directions.  When the pasta is ready, add the chopped spinach to the boiling water to blanch, then drain both the pasta and spinach (ensuring to get as much water out of the spinach as possible).

Crispy Shallots (aka grown up French’s fried onions):  While sauce and pasta are cooking, toss the thinly sliced shallots with enough flour to coat.  Heat olive oil in a saute pan over medium-high heat, add shallots, and cook until crispy and golden brown.  Remove to a paper-towel lined plate to drain excess oil.

Assembly:  When sauce is finished and pasta and spinach are cooked, pour sauce on top of pasta and spinach and toss to coat.  Don’t add all the sauce all at once, in case it’s too much (wait, is that possible?!).  Top with crispy fried shallots and serve immediately.

Isn’t it surprisingly easy to make homemade mac and cheese?  I think so :)  What other flavor combinations do you think would be good?  I’m thinking anything with bacon would be pretty amazing, but maybe that’s just me….

Caramelized Onion, Bacon and Goat Cheese Pizza

22 Apr

Before a few years ago, I had never really made homemade pizza.  Growing up, pizza was always ordered in, we never made it ourselves.  There is certainly a time and place for take-out pizza, and to me, it’s totally different from homemade.  But homemade pizza has its time and place too – and it’s less expensive and you can have much more creative liberty with it than takeout.

There are a lot of options in the store these days for pizza dough at home.  Dry mixes (like Betty Crocker), refrigerated vacuum-packed (like Pillsbury), pre-baked crusts (like Boboli), or store-made fresh dough (often found near the deli/refrigerated section).  I’m sure I’m missing some options, but as you can see, the possibilities are endless.

I personally tend to resort to using the store-made doughs or making my own.  I’m not a huge fan of pre-baked crusts like Boboli, but I do like using store-bought Naan as a crust sometimes.  Generally, I usually like to use whole wheat dough, which I can usually find available in the store-made dough selection.  Sometimes it’s not available though, so making my own  is the best option.  This also ensures that I know what’s in the crust, and it allows me to customize the flavor a little more too.  It does obviously take a little more time, but not much.  Making pizza dough is simple, but it certainly feels impressive, so I’d definitely encourage you to try it (just like making homemade pasta – but this is actually even easier than that!).

I think one of the other reasons I hadn’t made homemade pizza before a few years ago was that I didn’t know what sort of pan to use to bake a pizza at home.  Then, one of my aunts bought me a pizza stone, like this,  as a birthday present, and that changed everything :).  But, you can also use a pizza pan like this or like this.  If all else fails, you can use a heavy-duty cookie sheet.  There are a few things to remember when using a pizza stone, so make sure to read the directions (For example, you have to put the stone in a cold oven, then turn it on to preheat so the stone doesn’t crack.  Also, you can’t use soap to wash it, and depending on your stone, you may or may not be able to use a pizza cutter directly on the stone).

The pizza dough recipe below could be used to make any pizza you want – I just happened to feel like caramelized onions, bacon and goat cheese :).  I used the caramelized onions essentially as the sauce, but you could just as easily use a store-bought tomato pizza sauce and layer on any other toppings you want.  This dough recipe is for a Thin, Whole Wheat Crust.  The mixture of white and wheat flours gives a better flavor and texture than using all whole wheat flour.  This recipe yields enough dough for one large pizza, with a thin to medium crust, or, two small/medium pizzas with thinner crust.  The thickness will depend on how thin you roll the dough.

White/Wheat Pizza Dough

(I use half whole wheat and half white flour, but you could use all white or all wheat, though it will change the texture)

Time: 25 active, 30 inactive  Yield: 1 large or 2 medium/small pizzas

  • 1.5 cups all-purpose flour
  • 1 cup whole wheat flour
  • 1/4 ounce active dry yeast (found in the baking aisle)
  • 1 tablespoon sugar, divided
  • 1 cup warm water (not hot – this could kill the yeast)
  • 1 tablespoon olive oil
  • 1/4 teaspoon salt
  • 1 teaspoon garlic powder, optional
  • 1 teaspoon dried basil, optional
  • Cornmeal, for coating pizza stone to prevent sticking

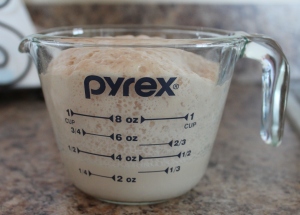
Add half the tablespoon of sugar to the warm water and dissolve.  Sprinkle the yeast on top.  After about 10 minutes, it should be all foamy – this is how you know the yeast is now active:

Meanwhile, combine the flour, salt, other half tablespoon of sugar, spices and olive oil in a large bowl (preferably of an electric mixer with dough hook attachment.  If you do not have one, this can be done in a regular bowl with a spoon, and can be kneaded by hand).  Add the yeast/water mixture and stir with dough hook/spoon until moistened and combined.

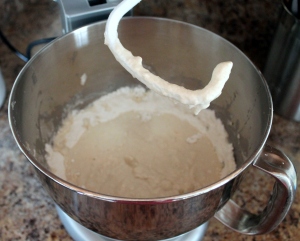
Continue to knead, either by hand or with a dough hook, for 6-8 minutes until the dough is smooth and elastic.  If too sticky, add more flour (a tablespoon at a time); if too dry, add water.  The dough should be moist but not sticky.  Below you can see the elasticity of the dough – keep kneading until it holds its shape as a nice ball.

Place the dough on a lightly floured counter and allow to rest for 20-30 minutes, covered with a damp towel.

Meanwhile, place your pizza stone in the oven and preheat the oven to 425°F.  Alternatively, lightly grease a 12″ metal pizza pan.

Once the dough has rested, gently roll/pat/stretch the dough out to the size you need.  When using a pre-heated pizza stone, I normally try to stretch out the dough as much as possible, then I take the stone out of the oven, sprinkle with cornmeal, then as swiftly as possible, place the dough on the stone and add the toppings.  Then I return it to the oven, usually 12-15 minutes, depending on the toppings.

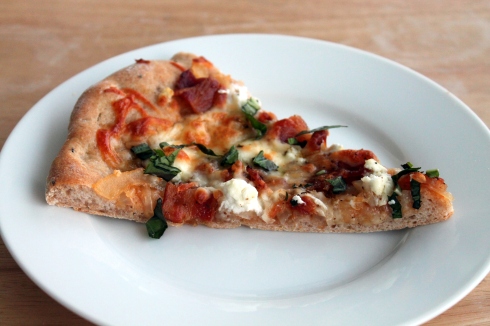
Caramelized Onion, Bacon and Goat Cheese Pizza

Time: 20 active, 35 inactive Yield: One 14″ pizza

  • 2 medium yellow onions, thinly sliced
  • 1/2 tablespoon butter
  • 1 tablespoon extra virgin olive oil
  • 1/4 cup white wine
  • 1 teaspoon tomato paste, optional
  • salt and pepper
  • 3 ounces goat cheese, crumbled
  • 1/2 cup mozzarella cheese
  • 6 slices bacon, cooked and cut into 1/2 inch pieces
  • Fresh basil, julienned
  • Olive oil, dried oregano and pepper for seasoning before serving

Preheat the oven (and pizza stone) at 425°F.

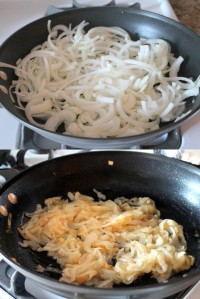
Over medium heat, heat the butter and olive oil in a saute pan and add onions.  Season with salt and pepper, and cook, until caramelized 15-20 minutes (low and slow is the best way for caramelized onions – you want them to become translucent, then gradually get golden brown, without actually browning or burning them).  Once caramelized, add white wine and tomato paste and cook until wine is evaporated.

See above recipe for dough or use store-bought.  Stretch to fit pizza stone or pan (as directed above).  Except try to make it prettier than mine.  I was being a little too hasty and not gentle enough, so I got a few wholes in my dough.  Be gentle and patient, unlike me.  Spread with caramelized onions, then sprinkle on goat cheese, bacon and mozzarella.

Bake for 12-14 minutes, or until cheese is melted and crust is golden brown. Remove from the oven and sprinkle with fresh basil, dried oregano, pepper and a drizzle of olive oil.

Slice (preferably on a cutting board), and serve immediately.

Mmmmm bacon and goat cheese.  Doesn’t get much better than that…even if the dough doesn’t look pretty, it will taste delicious, I promise.

So who’s feeling like pizza?  Was that a clear dough tutorial, or did I miss something?  Let me know if you have any questions and I will do my best to answer them in the Comments Section.

Recipe Review + An Easy Way to Cook Fish

12 Apr

Lately I haven’t had much time to come up with too many original recipes, plus I have been finding so many recipes I want to try in magazines and on Pinterest.  So I was thinking, I’d start a new sort of post here – Recipe Reviews.   I will post the recipe, a brief review of it, plus pictures of my adventures making it.  Then, like today, I’ll try to post suggestions or alterations that are possible from the recipe.

I have been meaning to write a post about easy ways to prepare fish for a while now, so the recipe for today just happened to be good timing.  The original recipe is from Everyday Food magazine  one of my personal favorites.  I always find the recipes in that magazine simple to prepare, yet flavorful and satisfying.  This recipe was no exception – with only 5 real ingredients – yet it was wonderfully flavorful (and super healthy!).  And, cooking fish in parchment paper or foil is one of my favorite techniques.  It steams the fish (and anything else you include in the foil or parchment packet, like vegetables), so it can be a really healthy way to prepare a meal relatively quickly.  I’ve shown below that I used parchment paper and foil and both worked equally as well.  I actually slightly prefer foil because 1) it’s easier to open and reclose to check if the fish is done and 2) it’s cheaper (ha – I really am frugal).

Here is the recipe, along with some additional instructions and pictures.  Below the recipe I’ve listed a few more ideas for different variations on this recipe (there must be an infinite number of combinations of fish and vegetables – so have fun with it!).

Ginger Orange Salmon in Parchment adapted slightly from Everyday Food Magazine (April 2012)

Yield: 2 servings; Time: 20 active + 20 inactive

  • 6 ounces baby spinach
  • 1 tablespoon orange zest
  • 2 medium oranges, peeled and cut into rounds*
  • 2 salmon fillets
  • 1″ piece fresh ginger, peeled and cut into thin match sticks
  • 1 shallot, thinly sliced
  • Salt and pepper
  • 1 tablespoon extra virgin olive oil

Preheat the oven to 400 degrees.  On two 16″ long piece of foil or parchment paper, place the spinach, followed by the salmon, orange zest, slices, ginger and shallots.  Season all with salt and pepper and drizzle with olive oil.

Form packets: fold the long ends of the foil/parchment together and make a seem, then tuck the ends underneath to secure (technique is not as crucial as making sure they are tightly closed so the steam stays contained in the packet).

Place packets on a rimmed baking sheet and bake 15-20 minutes.

Parchment or foil – either one works!

When nearing the end of cooking time, open the packets and check to see if the salmon is cooked through, resealing and returning to the oven for a minute or two if it needs more time.  Serve immediately.

*How to peel and segment or slice oranges:

Slice off both ends of the fruit.

Then, using a sharp knife, progressively cut thin strips of skin off, taking care to remove as little of the fruit as possible:

Then, you can either slice it into rounds, or individually cut each section out from the pith.


Variations to Try:

Whether you use parchment paper or aluminum foil, the possibilities are endless for this basic recipe.  You can get by with using very little fat, but the more butter or oil you use, the more delicious the results ;-).  I especially like using compound butters (softened butter mixed with any variety of herbs, garlic and seasoning you want).  Make sure to include enough citrus slices or vegetables to provide moisture to help the fish steam, to ensure a moist result.

The type of fish you use can also be changed easily too.  Depending on the thickness and how delicate the fish is, I would recommend trying out oven temperatures between 375 and 400 degrees, with cook times between 12 and 20 minutes.  This will also depend on how much other “stuff” you include in the packets.

  • Salmon with lemon/dill butter plus julienned yellow squash and finely diced tomatoes
  • Tilapia (or sole or flounder or halibut) with lemon slices, lemon juice, butter, garlic and asparagus
  • Salmon with thinly sliced fennel or leeks, plus a little white wine, herbs and butter
  • Halibut (or other white fish) with sliced baby bok choy and carrots, with ginger, garlic, soy sauce and sesame oil