Search results for 'pappardelle'

Homemade Pappardelle

30 Jan

One of my New Year’s Resolutions was to try cooking new things, new things I’ve never made before which may intimidate me.  Homemade pasta definitely fell into that category.

I’ve made gnocchi before, but never real pasta.  I guess I always assumed I needed some fancy pasta maker attachment for my Kitchenaid or something like that.  But then I noticed that this recipe for homemade pappardelle requires no fancy equipment and is actually categorized as “easy”.  I can do easy.

I would agree that this pasta was pretty easy to make, considering I thought it would be down-right hard.  The only frustrating part was when my eggs sort of overflowed over the edges of my flour volcano (see the steps below for explanation!) and so my hands got all sticky trying to save it and knead it.  Eventually, after adding more flour, it came together and resembled dough.  After which, it was almost therapeutic to knead the dough!

I think half the appeal of homemade pasta is the taste and texture (it really is chewier and better), and half is the satisfaction that comes from knowing you made it out of nothing (flour and eggs count as nothing).

So I encourage you to try making this at home – you may surprise yourself!  Soon I will be posting the recipe for the braised oxtail I served atop these beautiful noodles, but until then, enjoy them with copious amounts of butter, parmesan and/or sauce and meatballs.

Homemade Pappardelle  recipe from here

Time: 40 active, 40 inactive; Yield: 20 ounces of pasta

  • 1 3/4 cups all-purpose flour, plus more for dusting
  • 1 cup semolina flour*, plus more  for dusting
  • 6 large eggs, at room temperature
  • 4 teaspoons extra-virgin olive oil
  • Pinch of salt

*Semolina flour can either be found in the regular baking/flour aisle or the organic/health food aisle (near all the other alternative flours):

Sift both flours together, pile on a clean counter, and make a well in the center.   Make sure the well is very deep so the eggs don’t runneth over in the next step:

Place the eggs, olive oil and a pinch of salt in a bowl, then pour into the well.  With a fork, break up the eggs, then gradually mix the wet ingredients into the flour mixture just until combined.   This was the very messy step.  Try to keep the eggs in the center of the well and very slowly mix in the flour.  If it’s too sticky and messy, add some more flour.

Knead by hand, adding more flour if it’s too sticky, until the dough comes together.  This was the challenging part – try not to freak out about how messy your hands are, like I did.

Gather the dough into 2 equal-size balls; flour the surface. To knead each piece, push the dough away from you with the heel of your hand, fold the dough over itself and turn it counterclockwise. Continue pushing, folding and turning until the dough is smooth and elastic, 4 to 5 minutes.

Pat each piece into a ball. Flatten slightly, wrap in plastic and refrigerate for at least 30 minutes or overnight. (You can freeze 1 ball for later, or roll out both and freeze the cut pasta).

To roll out the dough, place it on a lightly floured surface and dust with flour. Starting in the middle, push away from you with a rolling pin, easing up on the pressure as you approach the edge.  Continue rolling the dough into a sheet, turning occasionally, until you can see your fingers through the bottom. Getting it thin enough is key.  Let dry about 10 minutes.

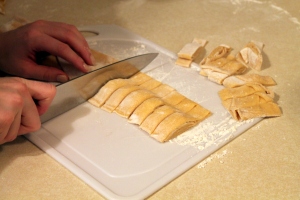
Dust the top of the sheet of dough with flour and loosely roll it into a cylinder.

Using a sharp knife, cut into 3/4-inch-wide slices.

Unwrap the noodles; dust with semolina and gently toss to separate. Place on a sheet pan and cover with a towel until ready to cook (or freeze in freezer bags for up to 2 months).

In a very large pot of rapidly boiling, salted water, cook the pappardelle until al dente, about 5 minutes.

Caramelized Onion, Bacon and Goat Cheese Pizza

22 Apr

Before a few years ago, I had never really made homemade pizza.  Growing up, pizza was always ordered in, we never made it ourselves.  There is certainly a time and place for take-out pizza, and to me, it’s totally different from homemade.  But homemade pizza has its time and place too – and it’s less expensive and you can have much more creative liberty with it than takeout.

There are a lot of options in the store these days for pizza dough at home.  Dry mixes (like Betty Crocker), refrigerated vacuum-packed (like Pillsbury), pre-baked crusts (like Boboli), or store-made fresh dough (often found near the deli/refrigerated section).  I’m sure I’m missing some options, but as you can see, the possibilities are endless.

I personally tend to resort to using the store-made doughs or making my own.  I’m not a huge fan of pre-baked crusts like Boboli, but I do like using store-bought Naan as a crust sometimes.  Generally, I usually like to use whole wheat dough, which I can usually find available in the store-made dough selection.  Sometimes it’s not available though, so making my own  is the best option.  This also ensures that I know what’s in the crust, and it allows me to customize the flavor a little more too.  It does obviously take a little more time, but not much.  Making pizza dough is simple, but it certainly feels impressive, so I’d definitely encourage you to try it (just like making homemade pasta – but this is actually even easier than that!).

I think one of the other reasons I hadn’t made homemade pizza before a few years ago was that I didn’t know what sort of pan to use to bake a pizza at home.  Then, one of my aunts bought me a pizza stone, like this,  as a birthday present, and that changed everything :).  But, you can also use a pizza pan like this or like this.  If all else fails, you can use a heavy-duty cookie sheet.  There are a few things to remember when using a pizza stone, so make sure to read the directions (For example, you have to put the stone in a cold oven, then turn it on to preheat so the stone doesn’t crack.  Also, you can’t use soap to wash it, and depending on your stone, you may or may not be able to use a pizza cutter directly on the stone).

The pizza dough recipe below could be used to make any pizza you want – I just happened to feel like caramelized onions, bacon and goat cheese :).  I used the caramelized onions essentially as the sauce, but you could just as easily use a store-bought tomato pizza sauce and layer on any other toppings you want.  This dough recipe is for a Thin, Whole Wheat Crust.  The mixture of white and wheat flours gives a better flavor and texture than using all whole wheat flour.  This recipe yields enough dough for one large pizza, with a thin to medium crust, or, two small/medium pizzas with thinner crust.  The thickness will depend on how thin you roll the dough.

White/Wheat Pizza Dough

(I use half whole wheat and half white flour, but you could use all white or all wheat, though it will change the texture)

Time: 25 active, 30 inactive  Yield: 1 large or 2 medium/small pizzas

  • 1.5 cups all-purpose flour
  • 1 cup whole wheat flour
  • 1/4 ounce active dry yeast (found in the baking aisle)
  • 1 tablespoon sugar, divided
  • 1 cup warm water (not hot – this could kill the yeast)
  • 1 tablespoon olive oil
  • 1/4 teaspoon salt
  • 1 teaspoon garlic powder, optional
  • 1 teaspoon dried basil, optional
  • Cornmeal, for coating pizza stone to prevent sticking

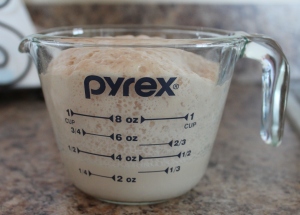
Add half the tablespoon of sugar to the warm water and dissolve.  Sprinkle the yeast on top.  After about 10 minutes, it should be all foamy – this is how you know the yeast is now active:

Meanwhile, combine the flour, salt, other half tablespoon of sugar, spices and olive oil in a large bowl (preferably of an electric mixer with dough hook attachment.  If you do not have one, this can be done in a regular bowl with a spoon, and can be kneaded by hand).  Add the yeast/water mixture and stir with dough hook/spoon until moistened and combined.

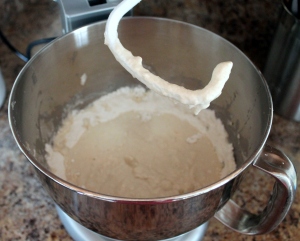
Continue to knead, either by hand or with a dough hook, for 6-8 minutes until the dough is smooth and elastic.  If too sticky, add more flour (a tablespoon at a time); if too dry, add water.  The dough should be moist but not sticky.  Below you can see the elasticity of the dough – keep kneading until it holds its shape as a nice ball.

Place the dough on a lightly floured counter and allow to rest for 20-30 minutes, covered with a damp towel.

Meanwhile, place your pizza stone in the oven and preheat the oven to 425°F.  Alternatively, lightly grease a 12″ metal pizza pan.

Once the dough has rested, gently roll/pat/stretch the dough out to the size you need.  When using a pre-heated pizza stone, I normally try to stretch out the dough as much as possible, then I take the stone out of the oven, sprinkle with cornmeal, then as swiftly as possible, place the dough on the stone and add the toppings.  Then I return it to the oven, usually 12-15 minutes, depending on the toppings.

Caramelized Onion, Bacon and Goat Cheese Pizza

Time: 20 active, 35 inactive Yield: One 14″ pizza

  • 2 medium yellow onions, thinly sliced
  • 1/2 tablespoon butter
  • 1 tablespoon extra virgin olive oil
  • 1/4 cup white wine
  • 1 teaspoon tomato paste, optional
  • salt and pepper
  • 3 ounces goat cheese, crumbled
  • 1/2 cup mozzarella cheese
  • 6 slices bacon, cooked and cut into 1/2 inch pieces
  • Fresh basil, julienned
  • Olive oil, dried oregano and pepper for seasoning before serving

Preheat the oven (and pizza stone) at 425°F.

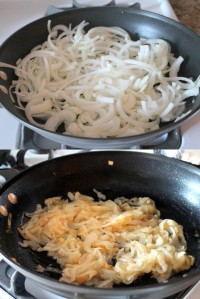
Over medium heat, heat the butter and olive oil in a saute pan and add onions.  Season with salt and pepper, and cook, until caramelized 15-20 minutes (low and slow is the best way for caramelized onions – you want them to become translucent, then gradually get golden brown, without actually browning or burning them).  Once caramelized, add white wine and tomato paste and cook until wine is evaporated.

See above recipe for dough or use store-bought.  Stretch to fit pizza stone or pan (as directed above).  Except try to make it prettier than mine.  I was being a little too hasty and not gentle enough, so I got a few wholes in my dough.  Be gentle and patient, unlike me.  Spread with caramelized onions, then sprinkle on goat cheese, bacon and mozzarella.

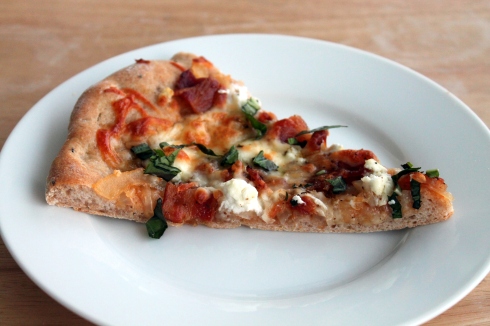
Bake for 12-14 minutes, or until cheese is melted and crust is golden brown. Remove from the oven and sprinkle with fresh basil, dried oregano, pepper and a drizzle of olive oil.

Slice (preferably on a cutting board), and serve immediately.

Mmmmm bacon and goat cheese.  Doesn’t get much better than that…even if the dough doesn’t look pretty, it will taste delicious, I promise.

So who’s feeling like pizza?  Was that a clear dough tutorial, or did I miss something?  Let me know if you have any questions and I will do my best to answer them in the Comments Section.

Braised Oxtail Ragù

2 Feb

There’s nothing like a slowly braised, rich, fall-off-the bone meat dish on a cold winter day.  Especially when you serve it over homemade pappardelle.  Too bad it hasn’t even been cold or wintery out!! (Who are we kidding, that is FINE by me!).  Regardless, I was in the mood for a wintery dish like this, and it turned out so delicious I would recommend it for any night of the year (preferably a weekend since this is a low-and-slow type recipe).

I had had a braised oxtail ragù dish recently at a local restaurant so I was anxious to try to make it myself at home, using this recipe from Osteria in Philadelphia, via Bon Appetit magazine.  Dishes like this at restaurants are so impressive, with such depth of flavor, but usually there are no fancy ingredients or techniques involved.  Just long and slow cooking to bring out the natural flavors.   And believe it or not, oxtail is not a hard-to-find ingredient.  I found it easily at my regular grocery store, which is not a gourmet store at all.

I wouldn’t call this a beginner-level recipe, but I wouldn’t say it’s advanced either.  All you have to do is read the directions and take the time to make it (it’s no 30 minute meal – so make it on the weekend!).  I highly suggest trying this recipe, even if you are intimidated – you and your friends will be very impressed, I promise!

The most labor-intensive part of this recipe was shredding the meat after it was cooked.  Oxtail has a lot of fat and cartilage and bone, which means there isn’t much meat.  Picking the meat off the bone takes time and a little patience, but it’s worth it.  Just make your kids (or husband) help you – men and kids don’t mind getting their hands messy, right?   If you can stand to wait, braising for longer than 2 hours may also help make this easier (just be sure that the liquid in the pot doesn’t over reduce – if so, add more broth).

Braised Oxtail Ragù recipe adapted from here

Yield: 4 servings at least (it is a very rich dish, you won’t be able to eat much!) Time: ~3.5 hours

  • 3 pounds oxtails (2-3″ pieces)
  • All purpose flour
  • 1/4 cup olive oil
  • 3 large celery stalks, coarsely chopped
  • 1 large carrot, peeled, chopped
  • 1/2 large onion, very coarsely chopped
  • 1 cup dry red wine
  • 3/4 cups canned crushed tomatoes with added puree
  • 2 garlic cloves, chopped
  • 3 fresh Italian parsley sprigs
  • 1 large fresh rosemary sprig
  • 2 bay leaves
  • 2 cups beef broth

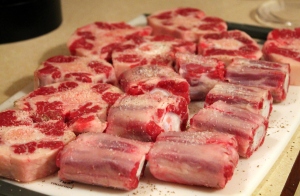
Preheat oven to 325°F.  Sprinkle oxtails with salt and pepper:

Then coat them in flour. Heat oil in heavy wide ovenproof pot over high heat.  Add oxtails;  cook until brown on all sides, about 15 minutes.  Transfer to bowl.

Add celery,  carrots, and onion to pot.  Reduce heat to medium-high and sauté until vegetables brown, about 15 minutes. Add wine and tomatoes. Boil until thickened to chunky  sauce, about 5 minutes. Sprinkle in garlic. Tie parsley, rosemary, and bay  leaves with kitchen string and add to pot.  Return oxtails to pot in single  layer (or as close to that as you can).  Add all broth; bring to boil.  Cover pot; place in oven.

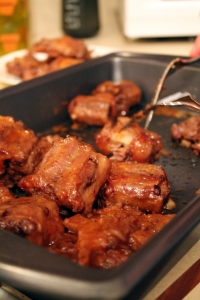
Braise oxtails until very tender, about 2 hours.

Transfer oxtails to rimmed baking sheet.  Pull meat off oxtails, avoiding large pieces of fat and bone. Set aside.

Using potato masher, crush juices and vegetables  in pot to make a coarse sauce.

Add meat back to pot and season ragù with  salt and pepper.   Serve over gnocchi or homemade pappardelle.  Garnish with fresh parsley and shaved parmesan.