Archive | Desserts RSS feed for this section

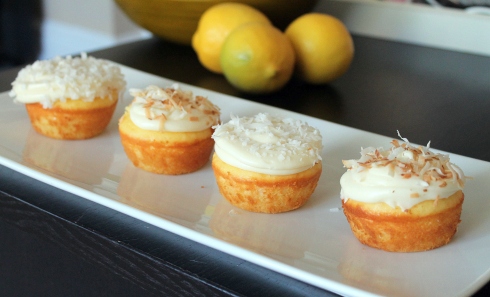
The Best Lemon Coconut Cupcakes of Your Life

3 Jun

…… or (an alternative title): The Best Cupcakes of your life in general.

This may sound a little extreme, but I just ate another one of these and was in heaven all over again, and I’m pretty sure you will agree (I know Matt and the rest of my family agreed!!).

Originally this was going to be a Lemon Coconut Cake creation.  That was until I was halfway through making the cake batter and could not locate any sort of round cake pans in my kitchen.  How is that possible!?  I even looked back at our wedding registry online to see if we registered for them….. nope?!  So I’m thinking what happened is that Matt and I both had sets of round cake pans in our separate apartments, and that they were probably old and gross so we got rid of them, thinking we would register for nice new ones.  And then we forgot to register for them.  Who knows?! Or else I really do have them somewhere and just couldn’t find them….

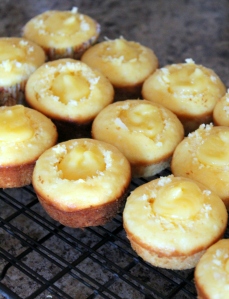
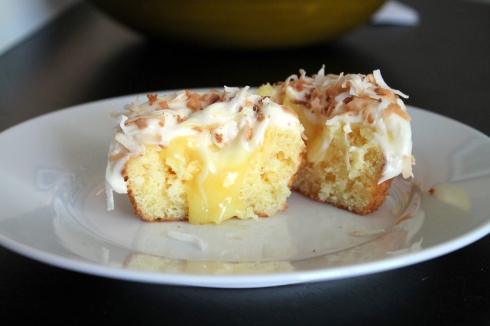
Oh well! The thing is, I think this recipe came out infinitely better as a cupcake anyway!  Instead of using the homemade lemon curd as a filling in between the layers of cake, I scooped out a bit of each cupcake and filled it with lemon curd:

Let me just say, I am mildly obsessed with lemon curd.  It’s just so sweet and tangy and creamy and tart and lemony and heavenly and … is this going too far?  I’ll eat it with a spoon.  Though a cupcake is a much better vehicle I must admit.

Anyway, the point was to make a lemon coconut cake for my mom for a belated Mothers Day celebration.  She loves lemon and loves coconut, and she definitely loved these cupcakes.  I somewhat cheated by starting with a boxed yellow cake mix (I’m going a little Sandra Lee/Semi-Homemade on you), but I made sure to jazz it up with lemon juice, sour cream and shredded coconut.

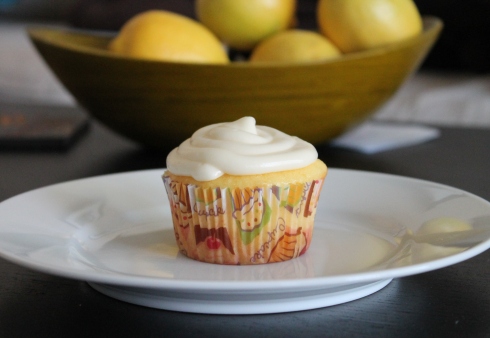
The frosting is a homemade cream cheese frosting, recipe adapted from Ina Garten, topped with shredded coconut (either toasted or not, you decide – we LOVED the toasted kind, plus it’s a bit prettier I think).

The lemon curd was also an Ina Garten recipe.  It was incredibly easy.  I didn’t make quite a full batch of it (namely because I only had 3 eggs and her recipe calls for 4, ha), but I’ll just link to her original recipe and you can adjust the batch size if you want.  A lot of lemon curd recipes call for using a double boiler-type set up, but her method was so much more simple.  Basically, mixing sugar and lemon zest and butter and eggs and lemon juice all together (it almost looked like cake batter to start), and then cooking it over low heat for just 10 minutes.  It was awesome.  And you don’t even need very many lemons, so it’s affordable too ;-)

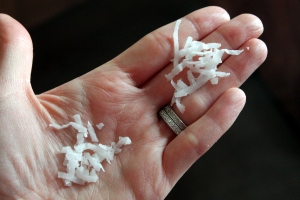
Other notes I want to mention: I pulsed the shredded coconut in a food processor before adding it to the batter. I didn’t want it to be stringy at all, like coconut can sometimes be.  This really helped and the coconut wasn’t so noticable in the cake itself.   See the difference?

Also, don’t be intimidated by the added step of scooping out some of the cake and adding lemon curd.  It was very easy to do with a spoon, and then you get to eat the leftover cake pieces and no one has to know :).

I find the easiest way to fill the cupcakes with the curd and to ice them is to put the curd and icing into ziplock baggies, cut off the corner, and pipe it in/on as if you are using a pastry bag (this saves a lot of time over spreading it with a knife, and it looks prettier).

So without further ado, a recipe that will change your life (haha, I’m so over the top about food sometimes, it’s ridiculous, I know):

Coconut Cupcakes with Lemon Curd Filling and Cream Cheese Icing

Yield: 24 cupcakes

Cake:

  • 1 yellow cake mix (I used Pillsbury Moist Supreme Classic Yellow – for reference, since other cake mixes may call for different amounts of liquid/eggs)
  • 1/3 cup oil (this is what the mix calls for)
  • 3 eggs (again, as per the box)
  • 1/2 cup sour cream
  • 1/4 cup lemon juice
  • 3/4 cup water (the box mix called for 1 cup water, so I used 1/4 lemon juice plus 3/4 water)
  • 1 cup shredded, sweetened coconut (pulsed in a food processor, optional)

Preheat the oven according to package directions.  Combine all ingredients (except coconut), according to package directions.  Stir in coconut, then scoop into cupcake pans (either sprayed with cooking spray or lined with cupcake liners), filling 2/3 full.  Bake and cool according to package.

Lemon Curd:

For the lemon curd, I used Ina Garten’s Recipe.  I adjusted the recipe to make a smaller amount, but if you make the recipe according to her directions you’ll have plenty of wonderful leftovers then.

I used a microplane zester to zest my lemons, so that elminated the need for me to pulse the lemon peel strips with the sugar as is stated in the original recipe.

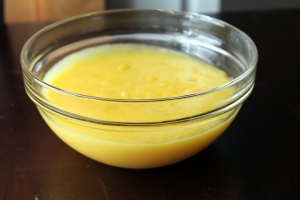
At first I was worried because the recipe seemed a little chunky and cloudy:

But as it cooked, it became clear and beautiful just like it should be.

Don’t be worried if it doesn’t seem as thick as it should be after the 10 minutes of cooking are up, because it will continue to thicken once it is cooled and refrigerated.

Cream Cheese Icing:

I again used Ina Garten’s recipe, found at the bottom of this recipe here.

I made a half batch, removed the almond extract, and made other slight adjustments so the ingredients were as follows:

  • 1/2 pound cream cheese (1 bar), at room temperature
  • 1/4 pound (1 stick) butter, at room temperature
  • 1/2 teaspoon vanilla extract
  • 1/2 pound confectioners’ sugar

Simply beat all ingredients with an electic mixer (or very strong arm) until smooth and combined.

To Assemble:

Once cupcakes are cooled, use a cookie scoop or small spoon to remove small portion of the middle of each cupcake:

Spoon cooled and thickened lemon curd into a small ziplock bag, seal, then snip one corner and pipe into the well of each cupcake.

Spoon icing into another ziplock bag and similarly cut off a corner to pipe the frosting on top of each cupcake, hiding the lemon curd inside.

Top each with shredded coconut, either toasted or not, it’s up to you! (To toast, place some coconut, about 5 ounces, in a dry saute pan on the stove.  Turn heat to medium low, tossing frequently to prevent burning.  Watch it carefully, it will toast quickly!).

If you don’t eat all the cupcakes in one sitting, store them in the refrigerator until your next binge :)

Orange Chocolate Chip Cookies

28 Feb

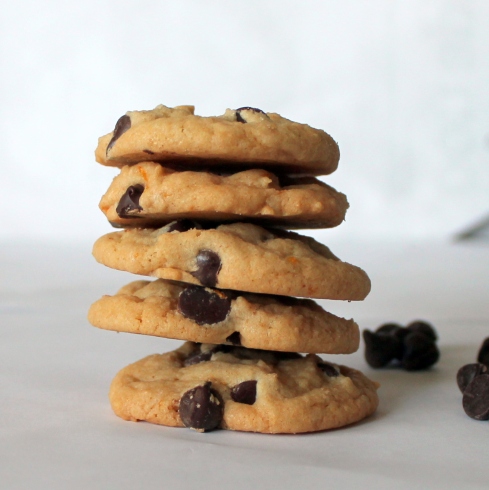
When I saw this orange chocolate chip cookie recipe on Foodgawker, and I knew I wanted to try them, especially when I read that they taste just like orange Milano cookies.   The recipe is originally from Cooking Classy, a blog I just discovered after seeing this recipe, but have quickly fallen in love with.  All the recipes look amazing and her photography skills are impeccable!  You should check it out.

Since the recipe is very similar to the chocolate chip cookie recipe I already use, I just added a little orange juice and zest to my existing recipe, and they turned out great.  Just enough orange flavor to be reminiscent of those yummy Milanos.

These cookies were (obviously) delicious hot and gooey out of the oven, but I also find that (if there are still any left), a few days down the road,  you can microwave them for 5-10 seconds to make them warm and gooey again.    And don’t forget the milk!

Orange Chocolate Chip Cookies inspired by the recipe found here

Yield: about 3 dozen

  • 2.5 cups all-purpose flour
  • 1.5 teaspoons baking soda
  • 1 teaspoon salt
  • 1/2 cup butter, softened
  • 1/2 cup Crisco
  • 1 cup sugar
  • 1 cup light brown sugar
  • 2 eggs
  • 1 teaspoon vanilla
  • 2 teaspoons fresh orange juice
  • Zest of one orange
  • 1.5 cups semi-sweet chocolate chips

Preheat oven to 375°F.

In a mixing bowl, whisk together flour, baking soda and salt, set aside.

With an electric mixer, beat butter, Crisco, and both sugars until light and fluffy, about 3 minutes.  Beat in eggs, vanilla, orange juice and orange zest.

Add in dry ingredients and mix until just incorporated.  Stir in chocolate chips, and drop cookies onto parchment-lined cookie sheets.

Bake 7-8 minutes.  Cool on cookie sheet several minutes, then transfer to a wire rack to cool completely.

And don’t forget to check out my  tips and tricks for keeping homemade cookies tasting fresh for days!

Black Forest Brownies

14 Feb

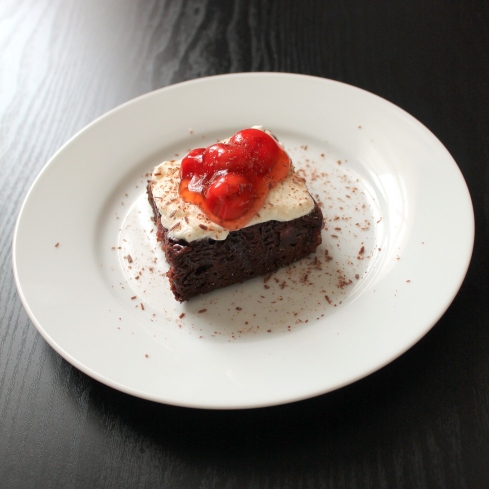
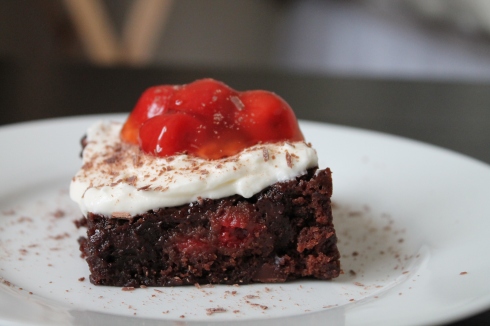
Valentine’s Day is here!  And what better way to celebrate than whipping up a special dessert for your loved ones?  Brownies are definitely one of my favorite desserts, and I thought, what could be better than Black Forest Cake?  Um, Black Forest brownies!  I love the cherry-chocolate combination, especially with the topping of a light cream cheese frosting.   I made up this recipe totally on a whim, not knowing how it would turn out, but Matt actually said this might be one of his favorite desserts ever.  That’s pretty monumental, and I’m pumped that they turned out so well!

Traditionally Black Forest cake is made with a whipped cream topping, so I wanted to combine that with a little bit of cream cheese frosting, and the result was DIVINE.  Like, probably this will be the cream cheese icing recipe I default on, because it had the lovely cream cheese flavor, without being so overly sweet and heavy.  It was light and delicious.

I like to cut the brownies and then spread the icing on, so I can do them “to order”.  If serving immediately for a crowd, feel free to spread them all and then cut them (though they may not turn out as clean looking).   I thought that they might get soggy if I frosted them all in advance and then didn’t eat them right away.  I just kept the frosting in a bowl in the refrigerator and spread it on a brownie as they are ready to be eaten.  Also, I like to store these brownies in the refrigerator because I thought they tasted better, and firmed up a little more, when kept chilled.

Black Forest Brownies

Time: 30 min. plus baking time  Yield: 16 brownies

  • 1 box brownie mix (I recommend Ghirardelli), plus eggs, oil and water for the mix
  • Chocolate chips (to add to the batter, if desired)
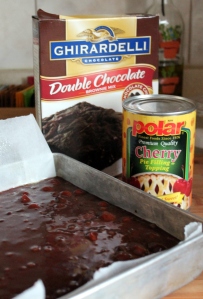
  • 2 cans cherry pie filling (16 ounces each) – I used Polar brand, which I had never heard of, but I liked that this brand did not contain high fructose corn syrup, just cherries and sugar, etc.
  • 1/2 cup heavy cream
  • 4 ounces reduced fat cream cheese, at room temperature
  • 1 cup confectioner’s sugar
  • 1 teaspoon vanilla
  • Chocolate shavings to garnish, if desired ;-)

Strain one can of the cherry pie filling to remove most of the liquid filling.  No need to rinse, just remove as much as possible so as to mix just the cherries into the brownie mix.

Prepare the brownies according to the package directions, stirring in the cherries from 1 can and chocolate chips (if desired)  immediately before pouring into a parchment-lined 9×9 baking pan. (Parchment lining allows you to remove the brownies from the pan as one unit, then you can cut them more easily on a cutting board).

Bake according to package directions.  Mine took slightly longer than the package instructions, possibly due to the increased moisture from the cherries.  So, you may want to extend the bake time by a few minutes if you notice they seem too wet when the time is up.  After baking, let the brownies cool completely in the pan.

Meanwhile, make the frosting.  In one bowl, whip the heavy cream with an electric mixer until it forms stiff peaks (when you pull the mixer out, the peaks on the mixer should stand up without flopping over).   In a separate bowl, beat the cream cheese, powdered sugar and vanilla until combined.  Gently fold the whipped cream into the cream cheese mixture.

Once brownies are cooled, cut into portions, then spread each with cream cheese topping.  Top each with some cherry pie filling, if desired.

Valentine’s Day Blondies

7 Feb

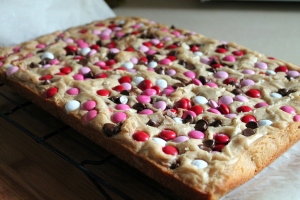
In honor of Valentine’s day, which is quickly approaching, and my little brothers coming to visit me, I wanted to make some festive blondies.  One would think that as such an extreme chocoholic, I would not condone blondies, which are basically like brownies, minus the chocolate.  However, I love them.  And they really remind me of one big chewy chocolate chip cookie.

These blondies turned out so buttery and had almost a butterscotch flavor, due to all the brown sugar in them.  They really tasted like Mrs. Fields cookies – YUM!  I may almost go so far as to say that they were slightly too butterscotchy, and next time I make them I might use half white sugar and half brown sugar (or maybe 3/4 brown, 1/4 white?).  Either way, I’m sure your family will love these!

I followed the basic recipe from Better Homes and Gardens, adapting it slightly to incorporate M&M’s and chocolate chips.  I also realized that I was almost out of all-purpose flour when I was just about to make these, so I used 1 cup self-rising flour and 1 cup all-purpose flour (the self rising flour elminated the need for the baking powder and baking soda, but I included the original measurements below because I’m sure most people have all purpose flour on hand).

Valentine’s Day Blondies recipe slightly modified from Better Homes and Gardens cookbook

Time: 20 min. active, 35 min. inactive, Yield: 9 x 13 pan – cut into as many as  you want!

  • 2/3 cup butter
  • 2 cups packed light brown sugar (or half brown, half white sugar)
  • 2 eggs
  • 2 teaspoons vanilla
  • 1 teaspoon baking powder
  • 1/4 teaspoon baking soda
  • Pinch of salt
  • 2 cups all-purpose flour (or 1 cup all-purpose and 1 cup self-rising, and eliminate the soda and powder)
  • 1 cup M&M’s
  • 1/2 cup semi-sweet chocolate chips

Preheat the oven to 350ºF.  Line a 13 x 9 baking pan with parchment paper (for easily removal and slicing of the bars), and spray with cooking spray.

Add butter and brown sugar to a medium saucepot and heat, stirring constantly, until butter and sugar are melted together and smooth:

Allow to cool for ~5 minutes (you don’t want to scramble the eggs in the next step, so this is important!).

Add the eggs to the sugar/butter mixture, one at a time, stirring until incorporated.  Stir in the vanilla.  Then stir in the flour/salt/baking powder/baking soda until combined.

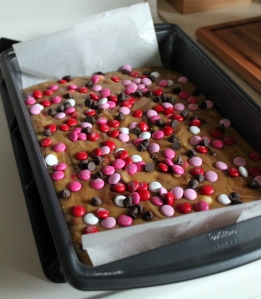
The mixture should be fairly cool by now.  Add in half the chocolate chips and some of the M&Ms (less than half).  Stir, and then pour the mixture into the baking pan.  Sprinkle the top with the remaining chips and M&Ms.

Bake until golden brown and a toothpick comes out clean, 25-30 minutes.  Cool in the pan on a metal rack for a few minutes then transfer the bar out of the pan onto the metal rack and cool more.

Slice when the bars are still slightly warm.

Day 9: Glazed Lemon Cookies

22 Dec

On the 9th day of Christmas, my true love gave to me: Glazed Lemon Cookies!  I think that’s how the song goes…

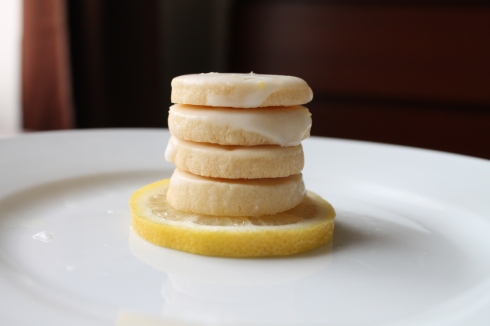
These cookies couldn’t be simpler – a basic shortbread type cookie topped with a very lemony glaze.  These have been a huge hit at my family Christmas parties, I think because they stand in such sharp contrast to other Christmas cookies (I have been known to make special batches for some special people such as my Grandma).   I think these cookies are so appealing around the holidays because are petite (and thus very poppable), not too sweet, and very refreshing with such a bright lemon flavor.

This recipe is a great make-ahead recipe because they keep very well at room temperature (they’re a dry shortbread already, plus have a protective layer of glaze, so they don’t really get stale), but you can also make the dough ahead and refrigerate or freeze it (see instructions below).  Also, you probably have most all of these ingredients on hand already – likely all you’ll need to buy is a few lemons!  Easy and cheap: love it.

Glazed Lemon Cookies (recipe from Real Simple Magazine, found online here)

Time: 20 min active, 1 hour 45 min total time, Yield: The original recipe says 48, but I got ~60 out of the recipe

  • 3/4 cup (1.5 sticks) butter, at room temperature
  • 3/4 cup sugar
  • 2 egg yolks (save the whites for another purpose, like a healthy omlette!)
  • 1/2 teaspoon vanilla
  • 1/4 teaspoon salt
  • 2 cups all-purpose flour
  • 1.5 cup confectioners’ sugar
  • 2 tablespoons fresh lemon juice, plus more if necessary – it has to be fresh, not the bottled kind!
  • 1 tablespoon grated lemon zest – or just use the whole lemon like I did!

Cookies:  With an electric mixer, beat the butter and granulated sugar until fluffy. Add the egg yolks, vanilla, and salt and beat to combine. Gradually add the flour, mixing until just incorporated.

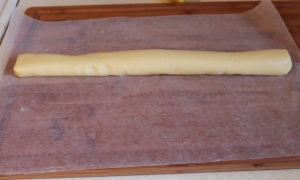
Divide the dough in half and shape into 1 1/4-inch-diameter logs. Wrap in wax paper and refrigerate until firm, about 30 minutes.

Heat oven to 350° F. Slice the logs into 3/8-inch-thick pieces and space them 1.5″ apart on parchment-lined baking sheets.  Bake until lightly golden, 16 to 20 minutes. Let cool on the baking sheets for 5 minutes, then transfer to cooling racks to cool completely.

Glaze:  In a small bowl, whisk together the confectioners’ sugar, lemon juice, and zest until it forms a thick but pourable glaze (add more lemon juice if necessary).  Dip the top of each cookie into the glaze and let set, about 15 minutes.

To freeze: Instead of refrigerating the dough, freeze the logs for up to 2 months. To bake, follow the recipe instructions, cutting and baking the dough from frozen, and use the upper end of the time range.

This cookie can be adapted to any number of citrus varieties since the dough itself is a plain shortbread.  In the summer, I have made some lemon and some lime, for a more interesting selection.  Orange or grapefruit might also be fun!  All you need is the fresh juice and zest.
 

Day 8: Chocolate Covered Cherry Cookies

21 Dec

Let me start off by saying that I ate three of these cookies before they were even cooled and that resulted in a sugar coma shortly after.  That being said, it was totally worth it.  I first made these cookies a few years ago, after I found the original recipe here from searching FoodGawker.   My mom loves chocolate and cherries, especially together, so I made these for her, and let me tell you, this recipe does not disappoint.

These cookies are slightly more labor-intensive than my molasses cookie recipe, but in my opinion, they are worth it!  The cookie itself has a fudgy, brownie-like texture, topped with a half a maraschino cherry and a smooth, fudgy chocolate topping.  This cookie will definitely satisfy your inner chocoholic, plus they’re practically a health food since they have fruit ;-)

Chocolate Covered Cherry Cookies (originally from here)

Time: 30-45 min prep + 10 min baking, Yield: ~40 cookies, depending how many you eat straight out of the oven…

  • 1.5 cups all-purpose flour
  • 1/2 cup Hershey’s dark cocoa powder
  • 1/4 teaspoon EACH baking soda, baking powder and salt
  • 1/2 cup butter (1 stick), softened
  • 1 cup sugar
  • 1 egg
  • 1.5 teaspoons vanilla
  • ~20 marachino cherries (about one jar), cut in half, juice reserved
  • 1/2 cup semisweet chocolate chips
  • 1/4 cup sweetened condensed milk (I used leftover from making my Peppermint Patties)

Preheat the oven to 350°F.

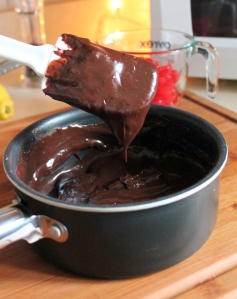
Chocolate topping:  Place chocolate chips and sweetened condensed milk in a small saucepan and melt over low heat.  Stir in 4 teaspoons of reserved cherry juice.  If chocolate becomes too thick, add a little more cherry juice.

Cookies:  Mix the flour, cocoa, soda, powder and salt in a bowl.   In a separate large bowl, beat the butter with a mixer until soft.  Add the sugar and beat until fluffy.  Beat in the egg and vanilla, then add the flour mixture gradually, and mix until well combined.  The dough will be very stiff.

Roll the dough into 1″ balls (I use this OXO Good Grips Small Cookie Scoop which makes the job very easy!) and place on parchment paper-lined baking sheets, about 2″ apart (parchment paper makes clean up a breeze! And you can reuse it for several batches). 

Make an indentation in each cookie with your thumb, and place a half a cherry into each. 

Top with ~1 teaspoon chocolate mixture, covering each cherry completely. 

Bake for 10 minutes, then cool on a wire rack.

*These cookies freeze well, so make them in advance!  Once cooled, transfer cookies to a Tupperware container lined with wax paper between each layer*

Day 3: Homemade Peppermint Patties

16 Dec

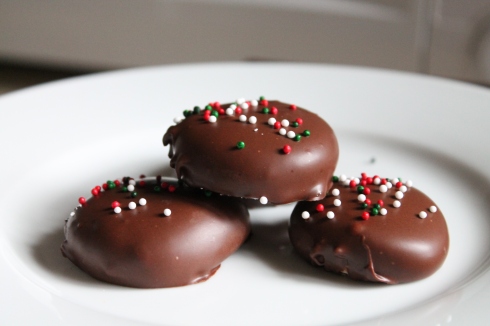
It’s Day 3 of the 12 Days of Christmas, and today I’ll share with you my adventures in making Homemade Peppermint Patties!  It had honestly never even crossed my mind that you could make homemade peppermint patties until I saw Giada make them on TV.   Of course she looked ever so graceful making them, without any mess left behind.  My kitchen and hands were covered in powdered sugar and chocolate after my adventures, but I think it was well worth it:

The recipe I used here is from Savory Sweet Life – which is a blog I LOVE, especially because her blog is where I found the idea for my wedding cake about 2 years ago! (Here’s the original link to her gorgeous fall leaf tutorial: Fall Leaf Cake).  I’m still in love.

Anyway, without further ado, here is the recipe.  The original recipe says “30 min” for total time – but that is in no way accurate.  This took me 2 hours total (which is what I expected).   And the yield says “32 pieces”.  I made the exact same recipe with the same size rounds (3/4″) and my recipe made 85!!! Glad I didn’t double it like I had originally planned!

Homemade Peppermint Patties  – from Savory Sweet Life

Yield: at least 75 pieces,  Time: at least 1.5 hours total

  • 1 can sweetened condensed milk (14 oz)
  • 5.5 cups powdered sugar (I ended up using about 6.5 cups)
  • 1 tablespoon peppermint extract
  • 3 cups semi-sweet chocolate chips (I think I used closer to 4…)
  • 3 tablespoons shortening

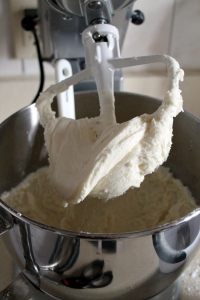
Mix condensed milk, 2 cups of powdered sugar and peppermint extract in a large bowl on medium speed using the paddle attachment until all the ingredients are well incorporated.  Add more powdered sugar, 1/2 cup at a time, until the dough is stiff but still pliable.  I ended up using about 6.5 cups sugar because the dough was too sticky after just 5.5.

Roll 3/4″ balls of dough between the palms of the hands.  Flatten into disks and place on a cutting board or plate with wax paper.  

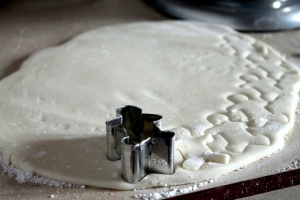
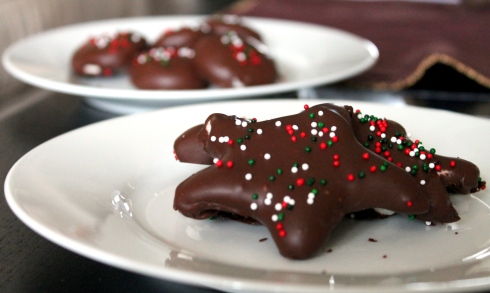
 Alternatively, you can roll out the dough like cookie dough and cut into shapes with cookies cutters.  The only small cookie cutter I had was a mini gingerbread man one, which now I would not recommend because the limbs tended to fall off when coating in chocolate.   Small stars would be really nice, but I might actually be the biggest fan of the classic circles.

Transfer the dough to the freezer to firm up for about 30 minutes (original recipe says not to exceed this).

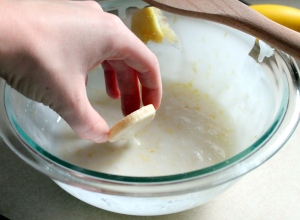
While the dough is chilling, melt the chocolate chips in the microwave (30 second bursts), stirring between each time until chocolate is smooth.  Stir in shortening to thin the chocolate.

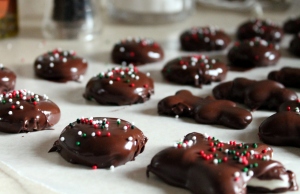
Remove patties from the freezer.  Use two forks to dip patties into chocolate, covering completely, and shaking off the excess.  Set on wax paper to firm up (this can be expedited in the fridge, but mine were mostly solidified by the time I got to the last batch). 

Overall, this recipe was surprisingly simple (who knew you only needed 3 ingredients to form the peppermint “dough”?) – and it was fun to play with.  Oh, and they also are pretty darn delicious.  Like, definitely better than the store bought kind. 

The most time consuming and frustrating part of this was definitely coating them in chocolate.  My advice would be to make sure you’ve adequately thinned the chocolate (and keep it relatively warm so it doesn’t get stiff).  And, if they turn out sloppy, just cover them with sprinkles :) 
Call me crazy, but next year I kind of want to try cinnamon ones.. with cinnamon extract and red food coloring… anybody with me?

Day 2: Molasses Cookies

15 Dec

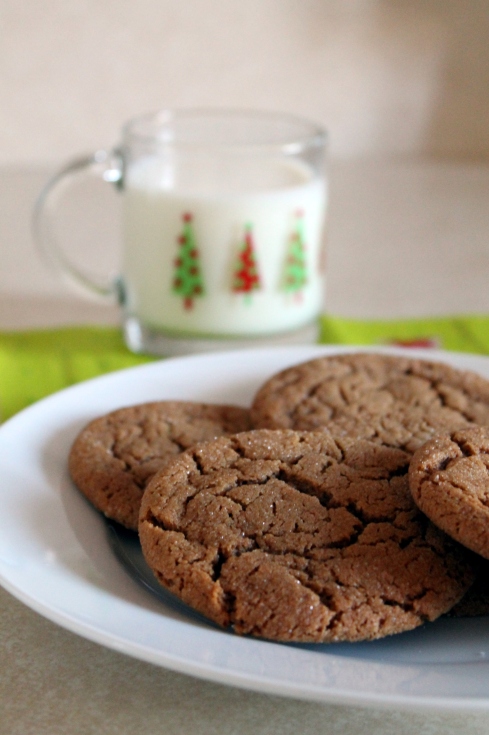
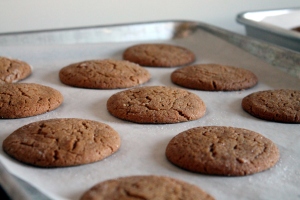
A few years ago, I set out to find a recipe to recreate the molasses cookies from Starbucks at home.  I’m not even sure if Starbucks still has these in stores, but they were huge, chewy, spicy and delicious.  I found this recipe online a few years ago (so it’s not my original!), but now I can’t seem to find the website I originally found it on.  I do think it’s very similar to a Cook’s Illustrated recipe though – so there’s my disclaimer!   Wherever it came from, this recipe is delicious, and molasses cookies are now one of the favorites in my family!

This year I made these cookies slightly smaller (to make them enormous like Starbucks, I used to use 1/4 cup dough for each cookie, and the recipe would make ~12 very large cookies) – this year I used closer to an 1/8 cup dough per cookie, so they are much more reasonably sized and better for holiday sharing. 

Molasses Cookies

Yield: ~30 cookies (1/8 cup dough per cookie), Time: 20 min + 12 min baking

  • 3/4 cup butter, softened (leave at room temperature or microwave very briefly – do not melt)
  • 1 cup dark brown sugar (I only had light brown on hand so I upped the molasses by a tablespoon or so)
  • 1 large egg
  • 1/4 cup unsulfured molasses (spray your measuring cup with Pam beforehand so it won’t stick!)
  • 2 1/4 cup all purpose flour (level flour in measuring cup with a knife to ensure accurate measuring)
  • 2 teaspoons baking soda
  • 1/4 teaspoon salt
  • 1 teaspoon cinnamon
  • 1 teaspoon ground ginger
  • granulated sugar, for rolling 

Preheat the oven to 375°F.

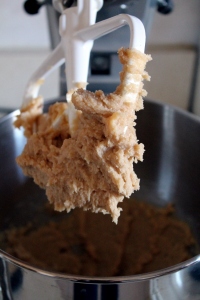
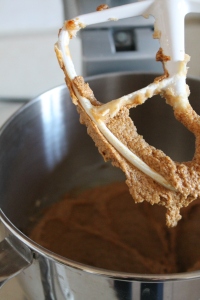
Cream the softened butter and brown sugar (I used a stand mixer with paddle attachment but you can do it by hand or with electric mixer). 

Add the egg and molasses, increasing to high speed for 1 min.

Mix in all the remaining dry ingredients on low until just combined.

Roll dough into balls (depending on the size of cookies you want, use between an 1/8 and 1/4 cup).  Roll dough balls in granulated sugar to coat, and place on parchment-lined baking sheets (this makes clean up a breeze). 

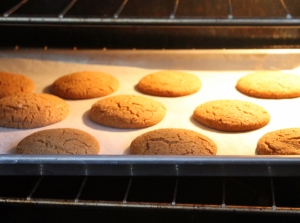
With your fingers, slightly flatten dough balls before placing in the oven for 12 minutes (adjust time if making larger cookies).  They will start to flatten and crackle when they are close to done. 

Remove from the oven and cool on the baking sheets for a few minutes.  Remove and transfer to cooling racks.

Give cookies to Santa and anyone else you love!