Archive | January, 2012

News!

31 Jan

Today I’m here with a post that’s different than usual, because I have some news to share that will affect the blog.

Starting next week, I will be starting a full-time job as a Food Scientist with a well-known food company in the area!

For a little background for those of you who don’t know me personally, I graduated a few months ago with my M.S. in Food Science, and have been busy over the past few months getting married, relocating, searching for a job and working on this little blog of mine.

I am very excited to finally begin my dream career, but I know that realistically, I can’t maintain posting 4-5 times per week while working full-time.  In addition, the job just happens to be about an hour and 15 minutes away from where we currently live, so with 2.5 hours of commuting each day, that leaves very little time for cooking (and taking pictures and editing and writing!).  Up until now, most of my best pictures and posts have stemmed from day-time cooking, since natural daylight is the #1 secret to good food photography.  Unfortunately now that will have to be saved for the weekends.

I’m still hoping to post at least 2 times a week, so please keep reading!  Starting a new job with crazy hours will also help fuel my creativity and make my recipes even more relatable.  Like most other people in the world, I’ll feel like I have no time to grocery shop or cook, so I’m sure I’ll develop some time-saving strategies and quick-and-easy weeknight meals.

Thanks for your continued support and readership!

Amy


P.S.  I am not planning to disclose the company I will be working for publicly on this blog at this time, since I don’t want any of my recipes/views/opinions on this blog to be seen as associated with that company in any way.

Homemade Pappardelle

30 Jan

One of my New Year’s Resolutions was to try cooking new things, new things I’ve never made before which may intimidate me.  Homemade pasta definitely fell into that category.

I’ve made gnocchi before, but never real pasta.  I guess I always assumed I needed some fancy pasta maker attachment for my Kitchenaid or something like that.  But then I noticed that this recipe for homemade pappardelle requires no fancy equipment and is actually categorized as “easy”.  I can do easy.

I would agree that this pasta was pretty easy to make, considering I thought it would be down-right hard.  The only frustrating part was when my eggs sort of overflowed over the edges of my flour volcano (see the steps below for explanation!) and so my hands got all sticky trying to save it and knead it.  Eventually, after adding more flour, it came together and resembled dough.  After which, it was almost therapeutic to knead the dough!

I think half the appeal of homemade pasta is the taste and texture (it really is chewier and better), and half is the satisfaction that comes from knowing you made it out of nothing (flour and eggs count as nothing).

So I encourage you to try making this at home – you may surprise yourself!  Soon I will be posting the recipe for the braised oxtail I served atop these beautiful noodles, but until then, enjoy them with copious amounts of butter, parmesan and/or sauce and meatballs.

Homemade Pappardelle  recipe from here

Time: 40 active, 40 inactive; Yield: 20 ounces of pasta

  • 1 3/4 cups all-purpose flour, plus more for dusting
  • 1 cup semolina flour*, plus more  for dusting
  • 6 large eggs, at room temperature
  • 4 teaspoons extra-virgin olive oil
  • Pinch of salt

*Semolina flour can either be found in the regular baking/flour aisle or the organic/health food aisle (near all the other alternative flours):

Sift both flours together, pile on a clean counter, and make a well in the center.   Make sure the well is very deep so the eggs don’t runneth over in the next step:

Place the eggs, olive oil and a pinch of salt in a bowl, then pour into the well.  With a fork, break up the eggs, then gradually mix the wet ingredients into the flour mixture just until combined.   This was the very messy step.  Try to keep the eggs in the center of the well and very slowly mix in the flour.  If it’s too sticky and messy, add some more flour.

Knead by hand, adding more flour if it’s too sticky, until the dough comes together.  This was the challenging part – try not to freak out about how messy your hands are, like I did.

Gather the dough into 2 equal-size balls; flour the surface. To knead each piece, push the dough away from you with the heel of your hand, fold the dough over itself and turn it counterclockwise. Continue pushing, folding and turning until the dough is smooth and elastic, 4 to 5 minutes.

Pat each piece into a ball. Flatten slightly, wrap in plastic and refrigerate for at least 30 minutes or overnight. (You can freeze 1 ball for later, or roll out both and freeze the cut pasta).

To roll out the dough, place it on a lightly floured surface and dust with flour. Starting in the middle, push away from you with a rolling pin, easing up on the pressure as you approach the edge.  Continue rolling the dough into a sheet, turning occasionally, until you can see your fingers through the bottom. Getting it thin enough is key.  Let dry about 10 minutes.

Dust the top of the sheet of dough with flour and loosely roll it into a cylinder.

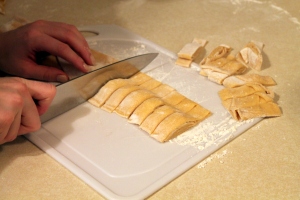
Using a sharp knife, cut into 3/4-inch-wide slices.

Unwrap the noodles; dust with semolina and gently toss to separate. Place on a sheet pan and cover with a towel until ready to cook (or freeze in freezer bags for up to 2 months).

In a very large pot of rapidly boiling, salted water, cook the pappardelle until al dente, about 5 minutes.

Vinaigrettes 101

27 Jan

Making vinaigrettes is definitely a skill you want to have in your culinary arsenal.  Whether it’s for throwing together a salad for which a store-bought dressing just won’t do (sometimes there’s not just a perfect flavor in the store – so this way you can customize your own!), or creating a nice vinaigrette sauce for fish or other meals, it’s a good skill to have.  Making your own dressings is simple, yet impressive.  Additionally, you can make them how you want them – without high fructose corn syrup or preservatives (not that there’s anything wrong with those, I am a Food Scientist after all, but sometimes it’s just nice to have things all-natural and homemade).  Plus, homemade dressings can be healthier (you control the amount of oil and sugar) and taste better (homemade balsamic vinaigrette is just so much better in my opinion!).

There are just a few basic principles to keep in mind:

(1) the basic components: fat (oil), acid (vinegar) and an emulsifier (optional)

(2) the ratios of these components

Ratios:

Typically, a ratio of 2 parts oil to 1 part acid is a good starting point.  Sometimes the ratio can be 1:1 (when using a weaker acid, like citrus juice) or even 3 or 4:1 (for very strong vinegars).  It’s up to you!  Just go by taste and consider what the dressing will be on – can it stand up to a strong vinegar or is it better if it’s toned down a bit?  I tend to like a 2:1 ratio (because I like a good vinegar tang and then there is less total fat and calories than a 3:1 ratio).

Fat/Oil:

  • Oils: Extra virgin olive oil, grape seed oil, walnut oil…
  • Dairy: Yogurt, buttermilk, cream…  I’m not going to go into detail on how to make your own cream dressings – I’ll save that for another day
  • Other: Avocado (to supplement the above oils)

Acid/Vinegar:

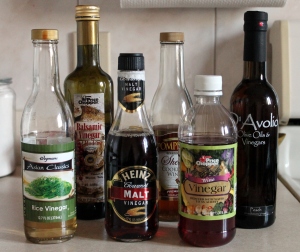
  • Vinegars:  Red wine, white wine, rice wine, balsamic, cider, Sherry or Champagne vinegar…
  • Citrus: Fresh squeezed lemon, lime or orange juice…

Emulsifier (or in non-Food Science terms, the component that can make the oil and vinegar come together and stay together – since naturally the oil and vinegar tend to separate)

  • Eggs: raw egg yolks (which I don’t condone) or pasteurized egg products (like Egg Beaters)
  • Mustard: Dijon, whole grain, spicy brown, honey…

Eggs and mustard both help to emulsify dressings because they contain amphiphilic molecules that interact with both water and oil (so they bridge the gap between the two and help hold them together, in very simplified terms!).  Vinaigrettes can also be pretty successfully emulsified by the use of a blender or food processor, without adding mustard or eggs – the force of a blender breaks up the fat into smaller droplets – which will make a fairly stable dressing that won’t separate as fast as one that was just whisked together.

Extras:

  • Onion/garlic/shallots: finely minced or even grated on a microplane
  • Seasonings: herbs (finely minced), spices, and definitely salt and pepper!
  • Sweetener: sugar or honey can really help complete a vinaigrette
  • Water: water can successfully be added to a dressing in small amounts to thin and to reduce calories
  • Hot sauce/cayenne pepper/red pepper flakes – something spicy, in a small amount can give a dressing a nice zing

To blend:

  • Whisk: The most traditional method.  Mix the vinegar, emulsifier and all other “extras” in a bowl, then slowly stream in the oil as you whisk the dressing vigorously in one direction.
  • Shake:  The quick-and-dirty method.  Place all the ingredients in a Tupperware or jar with a secure lid and shake until combined.
  • Blender/food processor:  If you want a more stable dressing, using the high speed of a blender or food processor will make a better emulsion (so it won’t separate as easily as the first two methods).  Like with whisking, add everything except the oil to the blender, turn it on, then slowly stream in the oil through the opening at the top of the blender or processor.  Using a hand-held immersion blender also works well.

Whether you want a more creamy, emulsified vinaigrette is up to you.  If you are tossing a salad with the dressing in advance, it won’t matter as much if it separates, compared to serving the dressing in a bottle on the table, where you may want the dressing to appear consistent and uniform for appearance sake.

Recipe for a Basic Vinaigrette

Yield: 1 cup, Time: 5 min

The cast of characters:

  • 1/4 cup vinegar of your choice (or 1/3 cup citrus juice) – in this example I used balsamic vinegar
  • 1 tablespoon water
  • 1/2 teaspoon salt
  • Fresh ground pepper
  • 1 teaspoon Dijon mustard (optional)
  • 1/2 teaspoon honey (or sugar, optional)
  • 1 dash Tabasco (optional)
  • 1-2 cloves garlic, grated or finely minced (or 2 teaspoons minced shallot)
  • 1/2 cup extra virgin olive oil

Methods:

Whisk:  Add first 8 ingredients to a bowl.  Whisk continuously while slowly streaming in the olive oil.

Shake:  Add all ingredients to a container (jar or Tupperware with a tight-fitting lid), cover, and shake until well combined.

Blender:  Add first 7 ingredients to the blender (not the shallots, if using – add after blending).  While the blender is running, slowly stream in the oil.

I shook mine:

With any dressing and method, taste and adjust the seasonings and ratio of oil/vinegar to your taste (ideally, dip a piece of lettuce in the dressing to see how the final product will taste).  Add more salt, sugar or pepper if needed.  Vinaigrettes like this can be stored in the refrigerator for a few days.

Mom’s Chili

25 Jan

Nothing says comfort food like a hot bowl of chili.  I definitely start craving it as soon as winter is in the air.  I love my Mom’s chili recipe because it’s just about the easiest thing to make – a true one pot wonder.  Plus, it’s basically just a jumping off point – feel free to adjust seasonings and ingredients – and I promise it will be delicious no matter what.   And while you’re at it, make a double (or triple!) batch and freeze it in individual containers for a quick dinner all winter long!

Mom’s Chili

  • 1.25 lb ground beef (or ground turkey, or half and half)
  • 1 medium yellow onion, diced
  • 2 garlic cloves, minced
  • 1 teaspoon cumin
  • 1 teaspoon salt
  • 3/4 teaspoon pepper
  • 1/4 cup chili powder
  • 1.5 teaspoon red pepper flakes
  • 15 ounce can diced tomatoes
  • 15 ounce can chili or kidney beans (or a mix)
  • 15 ounce can tomato sauce
  • 2 beef bouillon cubes

Optional additions:

  • 2 tablespoons cocoa powder
  • 1/2 cup beer
  • Frozen or canned corn

Serve with any or all of the following toppings:

  • Sour cream
  • Lime wedges
  • Avocado slices
  • Tortilla chips
  • Cilantro
  • Shredded cheese

In a large stockpot, brown the meat until cooked through.  Drain out the excess fat and set the meat aside.  Add the onion to the pot and cook until softened, over medium heat.  Add the garlic, cook for 30 seconds.  Add back the meat to the pan plus all other ingredients.  Simmer for a few hours, 1 at least, but the more the merrier!  It truly gets better and better the longer it cooks.   Last time I made it, it cooked for about 4 hours and it turned out fabulous.

Top with desired toppings and dig in!  Thanks Mom!

My First Real Dinner Party

24 Jan

Matt and I hosted our first real dinner party last week, for a group of friends we met through a fellow Notre Dame alumna.  I was a little nervous, since I felt some pressure to make an amazing meal, but it went very smoothly.   I served a simple, homey meal of roast chicken breasts, garlic green beans, honey butter carrots and salt-and-vinegar roasted baby potatoes.  Nothing fancy, just basic foods done well.  I took a few “before” pictures, but unfortunately no “after” pictures since I was so busy serving the guests!  So be forewarned, raw chicken pictures ahead!

Along the way, I feel like I learned some key tips to hosting a dinner party, so I will share those with you:

1)  Prep everything ahead.  The more you can do ahead, the better!  Either the night before or the morning of.  The morning of the dinner party, I prepped and blanched the green beans, peeled and cut the carrots and put them in the pot, par-cooked the potatoes (see below for the recipe), and made the compound butter for the chicken.  This made things so much easier later in the day.

2)  Make simple, well-practiced recipes.  Don’t try new things for a dinner party!  This may seem counter-intuitive, but if you cook something you are comfortable with and proud of, you will have less worries and no insecurities!  At most, experiment with one new recipe (just not the main one!).  Also, consider what your guests will like.  Are they going to appreciate a super spicy Thai curry?  Or are they a more traditional crowd?  For people I don’t know that well, I tend to stick with more comfort, traditional foods.

3)  Choose seasonal and/or on sale ingredients.  Go to the grocery store and see what looks good, what’s in season, and what is on sale before you decide on the menu.  That’s how I ended up cooking green beans and carrots, because they looked the best of the veggies in the store.  Dinner parties can also be expensive when cooking for a crowd, so choose your protein based on what’s on sale!   You don’t have to be cheap, just savvy.

4)  Be flexible.  Plan for the worst.  Have a back up plan.  Make enough food so there is plenty, just in case your guests are extra hungry or you have late additions.  It’s never bad to have leftovers anyway (we turned ours into soup!).

5)  Invite the right number of people for the kind of party you want.  We had 6 people total, which felt like the perfect size – not too many, not too few.  Too few people, and to me there is less motivation to put in a lot of work (is that bad?!).  But at the same time, that may be a good thing!  If you have too many people invited, it can become overwhelming and intimidating to cook so much food (especially if you want to make more labor-intensive recipes).  Plus you want everyone to be able to fit at a table together!

6) Take people up on their offers to bring something.  I think it’s generally true that if someone offers to bring something, that they would really like to.  It can be overwhelming to plan for not only dinner, but also drinks and dessert.  So if someone offers to bring drinks or a dessert, graciously accept!  That way you can focus more on the dinner, with one less thing to worry about!

7)  Put on some music.  Not too loud!  It’s awkward to feel like you are shouting over the music, but a little bit in the background really helps the atmosphere ;-)

8)  Set out snacks to buy you some time.  This is optional and depends on your timeline for the night.  If you plan to serve dinner very shortly after guests arrive, then you probably don’t need to have snacks, but inevitably, it always feels like dinner is delayed (see my next point).  If there are a few simple snacks out (store bought nuts, pretzels, hummus, olives or marinated mozzarella, etc etc) then at least it buys the cook some time to finish dinner and takes the pressure off.

9) Plan to have the food ready 15-30 min before it really should be ready.  It seems inevitable that if you plan to have dinner ready at 7, it’ll really be done at 7:30.  The chicken always takes longer than you think, or you get distracted, etc etc.   So just to avoid being frantic, I think it’s ok to plan to be done cooking a little before you would really like to be.  For example, our guests were scheduled to arrive at 6:30, so I was planning to have the food ready at 7 (no snacks, just dinner).  Originally I was planning on having the food done at 6:45, which I should have stuck with (!!), since the time I actually had the food done was……7:30.  Oops.  Learn from my mistakes people!

10)  Have fun!  Had to add this last one since a list of 9 things would just look weird.

For my dinner party, I made lemon-butter-herb roasted chicken breasts, which I have made several times now.  I don’t even have a recipe for it, but I just combine the following to make a compound butter:

  • Butter, softened
  • Fresh herbs (parsley, thyme, rosemary, whatever you have!), chopped
  • Salt and pepper
  • Fresh garlic, minced
  • Lemon zest

I don’t measure, I just eyeball it.  I’m pretty sure you can’t really mess it up.  Spread the compound butter and lemon slices under the skin of bone-in, skin-on chicken breasts (these stay SO much more moist than boneless, skinless), like this (sorry it kind of looks gross):

Drizzle the tops with a little bit of olive oil (to help them brown) and season with salt and pepper.  Roast in a 400-425°F oven for about an hour, or until the meat reaches 165°F (using a meat thermometer really makes it so much easier – that way you can have full confidence when it’s done and avoid over-cooking it).   Again, sorry I  do not have an after picture!!  Guess it was just so delicious that it was immediately devoured :)

On the side of the chicken, I served two simple vegetables:

Garlic Green Beans:  First, blanch the green beans in a pot of boiling water (that means, toss the green beans in boiling water for 30-60 seconds, to start the cooking and bring out the bright green color).  Remove and immediately place in a large bowl of ice water to quickly cool and stop the cooking.  This can be done ahead – just keep the beans in the fridge until ready for the next step.  To sauté, heat some olive oil and some butter in a skillet, and add several cloves of garlic (sliced, not minced).  Allow them to cook until lightly golden brown, then add the green beans and toss to coat with the garlicky oil, a minute or two until heated through.  Season with salt and pepper.

Honey Butter Carrots:  Cut 1 lb carrots into large pieces, and throw them in a pot.  Add a few tablespoons of butter, 1/4 cup of water, a generous drizzle of honey, some salt, pepper and a dash of ground ginger (if you have it):
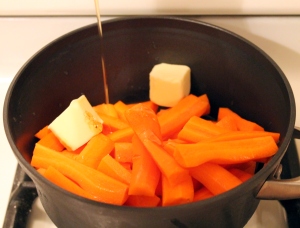
Turn heat on medium and bring to a boil.  Stir, cover and reduce heat to medium-low and cook for 5 minutes.  Uncover, increase the heat and cook, allowing some of the liquid to evaporate.  Lower the heat, cooking until tender.  Sprinkle with fresh parsley before serving and a squeeze of lemon juice, if you have it!

The green beans turned out great – still had some crunch to them, and lots of garlic flavor.  The carrots were the best I’ve ever made.  I don’t even normally like cooked carrots, and I had seconds and thirds of these!  That must speak volumes!

I also served these Salt and Vinegar Roasted Potatoes along side:

I broke a rule of entertaining by trying these out for the first time at a party, and I paid for my mistake!  They turned out good, but not great.  I think I would have added more salt and more vinegar if I could do it over, though I already felt like I added a lot of salt and was scared to add too much vinegar!  The potatoes didn’t get as crunchy and roasty as I thought they would, so that was another thing that fell short.  I would make them again, but I didn’t think they were particularly impressive.

So there you have it – my adventures in dinner parties!  Feel free to share your advice in the comments section!

Individual Baked Oatmeal

23 Jan

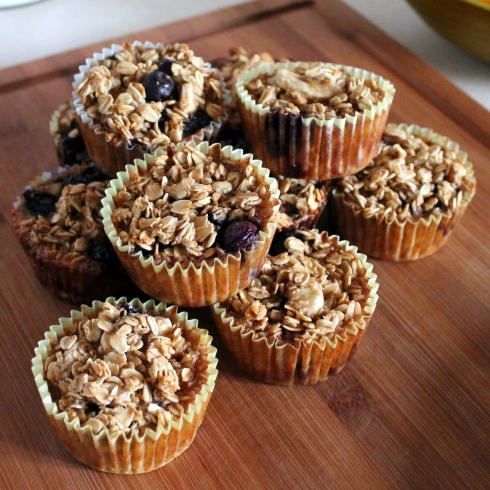
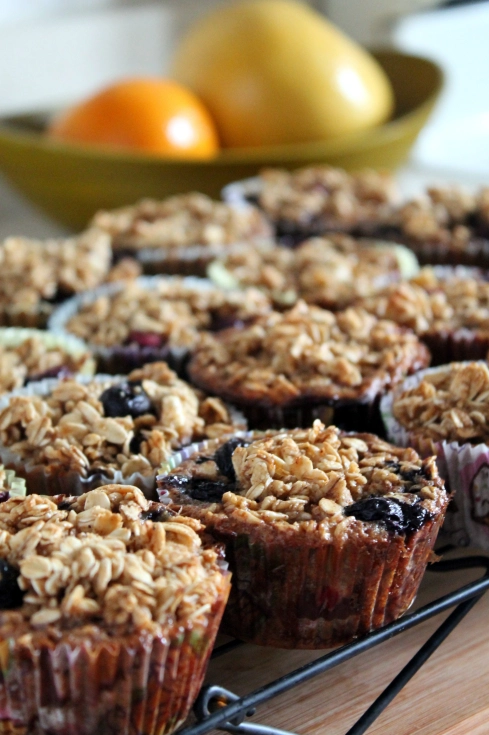
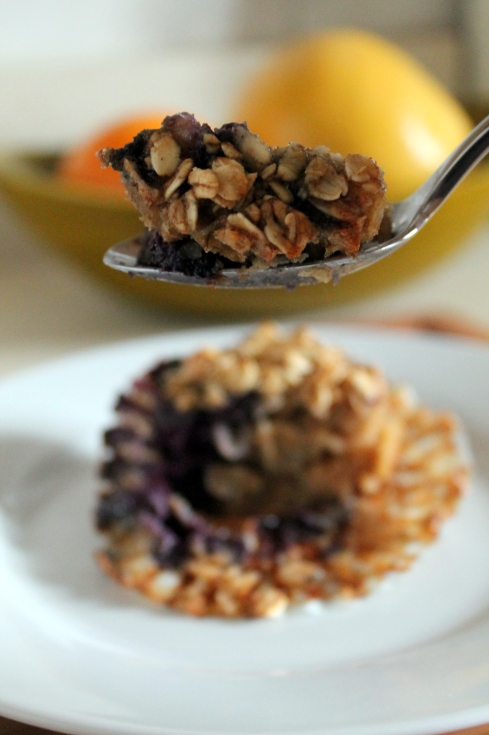
I have been wanting to try baked oatmeal for a long time, but it wasn’t until I saw these individual baked oatmeals on Pinterest that I actually tried it – it seemed much more reasonable for 2 people to make lots of individual ones than one giant casserole of baked oatmeal, which we probably could not finish.

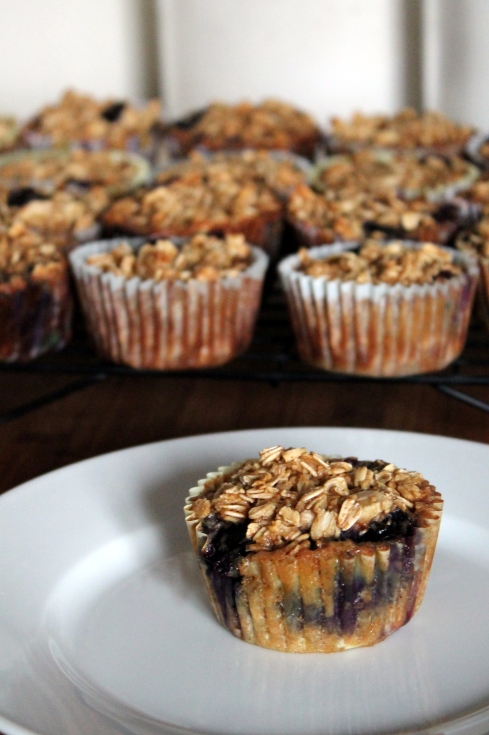
I don’t normally like oatmeal.  Call me crazy, but the mushy texture kind of makes me want to gag.  The only reason I eat it is because it’s healthy, so thank God I found this recipe which combines the healthfulness of the oatmeal and a much better texture!  Now I can actually enjoy my oatmeal!  The texture is more similar to a muffin: chewy on the top and soft in the center, but they contain no flour at all (so they are also gluten-free).  Plus, if you make a big batch of these babies and freeze them, it actually takes less time to heat one of these up than to make a real bowl of oatmeal!

I modified the original recipe to the ingredients I had on hand (the original recipe calls for applesauce, flaxseed and Stevia, all of which I didn’t have and didn’t miss!).  This seems like a recipe that you could really play with and customize to your likings.  Especially if you want them to be more kid-friendly (add chocolate chips or raisins!  And maybe even more sugar) or more healthy (use the flaxseed like the original recipe or experiment with sugar substitutes).  Here is the recipe that I followed (with pretty fabulous results!):

Individual Baked Oatmeal  originally from Sugar-Free Mom 

Yield: 20 muffins, Time: 20 min. active, 40 min. inactive

Please find the original recipe and ingredient list here.

My modifications:

  • Used 1 cup brown sugar, not any Stevia
  • Used 1 cup fresh blueberries (but fresh or frozen anything (like cranberries, apples, cherries etc.) would work.  Even raisins or chocolate chips or dried coconut would work, but I would probably use less than 1 cup)
  • Added 1/4 teaspoon nutmeg
  • Eliminated the flaxseed and applesauce
  • I would also suggest increasing the amount of banana if you like banana!

Directions:

Preheat oven to 350°F.

In a large bowl, stir together the eggs, vanilla and sugar, then stir in all the fruit.

In another bowl, combine the oats, salt, baking powder, cinnamon and nutmeg.

Dump the dry ingredients into the wet ingredients; stir to mix well.

Pour in the milk and stir until combined.  The mixture will be pretty soupy – and it will seem too wet, but it’s not!

Scoop mixture into paper-lined muffin cups (I sprayed mine with cooking spray too just to make sure they would come out easily) – scoop with a measuring cup and make sure they have an even amount of liquid in each cup.  See how liquidy they look before baking?  It’s weird but they’ll turn out fine, don’t worry!

Bake 35-40 minutes or until the center of each muffin is set. (Mine took 35 min)

Cool and enjoy — or freeze them in gallon freezer bags.

To reheat from frozen, just pop them in the microwave for 30-40 seconds til warmed through.

Tex-Mex Rice and Beans

19 Jan
It feels like it’s vegetarian week here on the blog, but it’s not on purpose.  Not, not on purpose either though I guess.  We probably eat meat free meals at least once a week – it’s generally cheaper, sometimes healthier, and meat free meals just tend to be what I would throw together if I don’t have a protein in mind for the meal.  So without further ado, another meat-free meal…
I normally wouldn’t post a recipe which I followed almost exactly and for which my pictures did not turn out well, but this one was so good, that I really wanted to share it!   I found it in Food Network Magazine, and it is an absolutely simple but delicious meal. Here’s the original picture from Food Network, which puts mine to shame:
Photo from Food Network Mag
This meal is vegetarian, but you won’t even miss the meat (even Matt will vouch for this – he is all about meat, but he loved this!).  With a few small changes that I’ve noted below, this can be made even healthier (like substituting brown rice for white and Greek yogurt for sour cream).  We also added corn into the mix for an added serving of veggies.
Tex-Mex Rice and Beans originally from Food Network Mag
Yield: 4 servings, Time: 30 min.
  • 1 cup white rice (I used brown)
  • 1 tablespoon extra-virgin olive oil
  • 1 cup fresh salsa, plus more for topping (the kind in the refrigerated section)
  • 1/2 teaspoon ground cumin
  • 14 ounce cans black-eyed peas, undrained
  • 14 ounce can black beans, drained and rinsed
  • 3 cups baby spinach
  • 1/4 cup chopped fresh cilantro
  • 1 avocado, halved, pitted and sliced
  • 1 cup shredded cheddar cheese
  • Greek yogurt, for serving (this is the BEST substitute for sour cream!)

Cook the rice according to the package directions.

Meanwhile, heat the olive oil in a medium saucepan over medium-high heat. Add the salsa and cumin and cook, stirring, until the salsa is soft, about 5 minutes. Add the black-eyed peas (plus the liquid from the can) and black beans and 1/4 cup water. Cook, stirring occasionally, until the beans are creamy and tender, about 12 minutes.

Fluff the rice with a fork and divide among bowls. Add the spinach and cilantro to the black-eyed pea mixture and stir until wilted, about 1 minute; spoon evenly over the rice. Top each serving with a few avocado slices, some cheese and more salsa. Serve with Greek yogurt, if desired.

Farfalle with Brie, mushrooms and arugula

18 Jan

If there was only one food I could eat for the rest of my life, I’d probably choose Brie.  Or bagels.  Or enchiladas.  Or chocolate chip cookies.  Anyway, that’s besides the point.

I love Brie, but I definitely feel like there are not enough opportunities for me to eat it.  Picnics (Brie and a baguette and a plastic knife = a struggle I have had more times than I care to share) and holiday parties (puff pastry wrapped baked Brie.. so greasy, so delicious, amen) are just not frequent enough to fulfill my Brie quota.

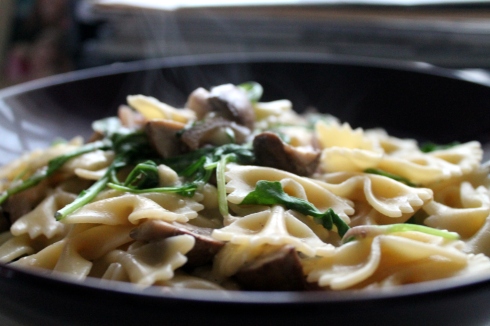
ANYWAY, I made this pasta, originally from Real Simple Magazine.  It’s pasta with melted Brie, sauteed onion and mushrooms and wilted arugula.  I made this as a quick and easy lunch for one, so I like that this recipe comes together quickly and that you can very easily adjust the amount you make (you will have some leftover mushrooms or red onions this way, but those can be used in so many ways – stir fry, omlettes, salads, etc so I don’t mind having extras in my fridge.).

The mix of the creamy, rich Brie and the mushrooms which soak up all the wine flavor was pretty delicious.  And the peppery arugula adds a nice freshness and color.  In general I’d say this recipe is pretty yummy, but definitely not over-flavorful, just mild and subtle.  So make sure to season the pasta water generously with salt before cooking the pasta, and be generous with the salt and pepper when cooking the mushrooms and onions.   Also, use a good wine, because the flavor really gets soaked up by the mushrooms.  I actually used vermouth instead of wine, because I didn’t want to open a whole bottle for the recipe.  I keep vermouth in my fridge all the time (it keeps, opened, for months) as a substitute for wine for recipes or for martinis ;-).    If you really want to jazz this recipe up, and aren’t a vegetarian, I bet adding some proscuitto or pancetta would be pretty awesome in it too.

Farfalle with Brie, mushrooms and arugula  recipe from Real Simple Magazine

Time: 20 min, Yield: 4 servings

  • 12 ounces farfalle (or any shape pasta you like!)
  • 1 tablespoon olive oil
  • 1 lb mushrooms, quartered (I used baby bella)
  • 1 small red onion, sliced
  • 1/2 cup dry white wine or vermouth
  • Salt and pepper
  • 8 ounces Brie, cut into 1/2″ cubes, most of the rind removed (but you don’t wanna lose too much of the Brie! That would be tragic)
  • 4 cups baby arugula

Cook the pasta according to the package directions, making sure to reserve 1/2 cup of the pasta cooking water before draining (using the starchy pasta water to help make a sauce is a great trick).

Meanwhile, heat the oil in a large skillet over medium-high heat.   Add the mushrooms and onion and cook, tossing occasionally, until the mushrooms begin to release their juices, 2 to 3 minutes.  Add the wine, ½ teaspoon salt, and ¼ teaspoon pepper and cook until the mushrooms begin to brown, 5 to 6 minutes.

Toss the pasta with the Brie and reserved cooking water until the pasta is coated.  Stir in the mushroom mixture and arugula and serve.

Tomato Soup with Israeli Couscous

17 Jan

Soup is one of my favorite meals to cook, even on a weeknight.  Soups like this one come together quickly, are comforting and satisfying, yet are usually relatively healthy, since you don’t need to add much fat.    This one is fresh, yet flavorful, and I added lots of Israeli couscous (a very small, round pasta – usually found in the rice section) because I love the texture it adds.  I also added some baby spinach to feel like I really got enough vegetables in this one-bowl meal.

Tomato Soup with Israeli Couscous

Yield: 4-6 servings, Time: 30 min

  • 2 tablespoons olive oil
  • 1 yellow onion, chopped
  • 2 carrots, diced
  • 14 oz canned diced tomatoes
  • 6 garlic cloves, minced
  • 6 cups vegetable or chicken stock
  • 1-1.5 cups Israeli couscous (depending how much pasta you like)
  • 2 mint sprigs, chopped (or a few pinches of dried mint)
  • 1/2 teaspoon cumin
  • 5 sprigs cilantro, chopped
  • cayenne pepper, salt and black pepper to taste
  • Optional: 2 cups fresh baby spinach
  • Parmesan cheese, for serving

Heat the oil in a large pot, add the onions and carrots and cook until softened, about 10 minutes.  Add half the garlic and cook about 1 minute (don’t let it burn!).  Add the tomatoes, stock, couscous, and all the herbs and seasonings.

Bring the soup to a boil, add the remaining garlic, and reduce heat to simmer gentle for 10-12 minutes until couscous is tender.   Add in the baby spinach and let it wilt.  Serve piping hot, topped with parmesan cheese and more mint and cilantro, if desired.

Sweet Potato “Fries”

16 Jan

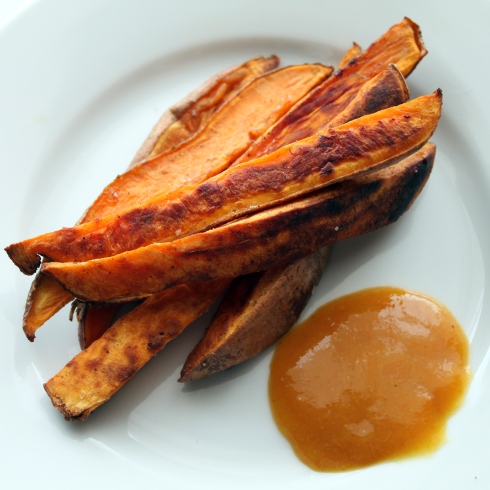
Sweet potatoes are one of my favorite vegetables, especially when they’re cooked to mimic French fries.  Better yet when that cooking method still preserves the healthfulness of the potatoes (with  much less fat than actually frying and leaving the skin on, which keeps vitamins intact).  Best yet, these fries cook a lot more quickly than baking a whole potato.
Sweet Potato “Fries”

Time: 20 min, Yield: 2 servings

  • 2 sweet potatoes, scrubbed (no need to peel)
  • 2 T. olive oil
  • Salt, pepper, chili powder, cinnamon and/or cayenne pepper, to taste

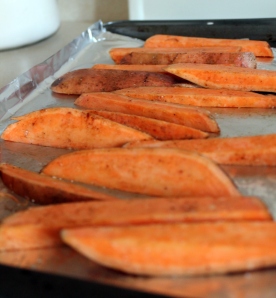
Place a baking sheet in the oven, and preheat to 425ºF.  This is key to getting a crispy fry.

Slice potatoes into long wedges, and toss in olive oil and your choice of seasonings (I used all of the above – but just a touch of cinnamon and touch of cayenne).  Spread the wedges out onto the hot baking sheet and return to the oven.
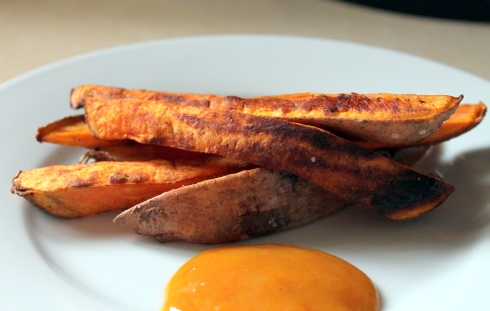
Bake for 10 minutes, flip, then bake for another 5-10 min until tender and crispy.

Serve with ketchup or honey or… if you’re in the miniscule percentage of people who have this lying around, like myself…. banana ketchup!  We bought it while we were vacationing in St. Lucia and I must say it’s a pretty perfect complement for sweet potato fries.  Maybe I’ll try making some from scratch – I think it’s just banana, a touch of vinegar and tomato paste.  I’ll keep ya posted on that one!  Until then, regular ketchup or honey would do just fine!  Or if you’re feeling really crazy, how about a little bit of marshmallow fluff thinned with butter? ;-)