Archive | February, 2012

Orange Chocolate Chip Cookies

28 Feb

When I saw this orange chocolate chip cookie recipe on Foodgawker, and I knew I wanted to try them, especially when I read that they taste just like orange Milano cookies.   The recipe is originally from Cooking Classy, a blog I just discovered after seeing this recipe, but have quickly fallen in love with.  All the recipes look amazing and her photography skills are impeccable!  You should check it out.

Since the recipe is very similar to the chocolate chip cookie recipe I already use, I just added a little orange juice and zest to my existing recipe, and they turned out great.  Just enough orange flavor to be reminiscent of those yummy Milanos.

These cookies were (obviously) delicious hot and gooey out of the oven, but I also find that (if there are still any left), a few days down the road,  you can microwave them for 5-10 seconds to make them warm and gooey again.    And don’t forget the milk!

Orange Chocolate Chip Cookies inspired by the recipe found here

Yield: about 3 dozen

  • 2.5 cups all-purpose flour
  • 1.5 teaspoons baking soda
  • 1 teaspoon salt
  • 1/2 cup butter, softened
  • 1/2 cup Crisco
  • 1 cup sugar
  • 1 cup light brown sugar
  • 2 eggs
  • 1 teaspoon vanilla
  • 2 teaspoons fresh orange juice
  • Zest of one orange
  • 1.5 cups semi-sweet chocolate chips

Preheat oven to 375°F.

In a mixing bowl, whisk together flour, baking soda and salt, set aside.

With an electric mixer, beat butter, Crisco, and both sugars until light and fluffy, about 3 minutes.  Beat in eggs, vanilla, orange juice and orange zest.

Add in dry ingredients and mix until just incorporated.  Stir in chocolate chips, and drop cookies onto parchment-lined cookie sheets.

Bake 7-8 minutes.  Cool on cookie sheet several minutes, then transfer to a wire rack to cool completely.

And don’t forget to check out my  tips and tricks for keeping homemade cookies tasting fresh for days!

Cream of Broccoli Soup

23 Feb

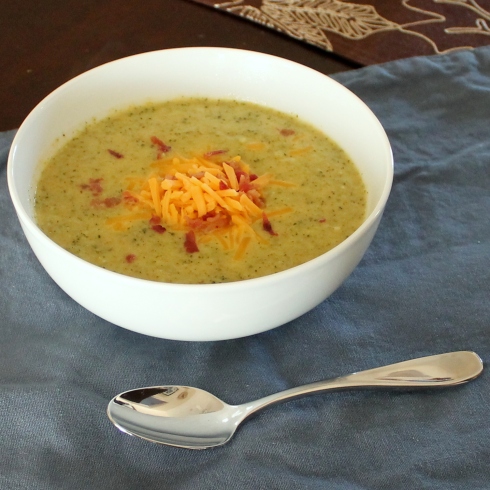
Of all puréed vegetable soups, I think cream of broccoli is my favorite.  Even if it makes my house smell funny.

It’s especially irresistible when it topped with copious amounts of cheddar cheese… mmm.

When developing the recipe, I wanted the soup to be creamy, but not overly fat-laden and calorie-dense.  I wanted the recipe to be delicious, but not to undo all the “good” from eating lots of broccoli.  One thing you’ll notice is that I included 1 white potato in the recipe, which once cooked down, helps thicken the soup with all its starchiness.  This helped me minimize the amount of half and half to only 1/2 a cup!  But the texture is still rich and creamy (Ok, I’m sure the cheese helps too, but I couldn’t eliminate that!).   If you’re not worried about calories, feel free to add more cream or cheese or butter or maybe even some bacon :-D

There are a few things I’ll point out about the recipe in advance, since I’m feeling wordy today.

  • When I added the broccoli, I also added 1 cup water because I thought it needed a little more liquid to steam and so that it would be thin enough to puree, but you could also start with 4 cups of stock in the beginning and skip the water (4 cups is usually the size of those store-bought containers anyway).
  • Just roughly chop the vegetables since they will end up puréed anyway (though you do want them to be roughly the same size so they cook at the same rate).  The smaller you cut the potato, the faster it will cook, so if you want to hurry this recipe up, keep things diced small.
  • The list below looks like a long list of ingredients, but you probably already have most of them on hand (and the others are inexpensive).  Don’t go out and buy a whole head of celery for the recipe (unless you want to) if it seems like too much – just make do with what you’ve got!  You could even substitute milk for the half and half if you don’t want to buy that, though you may want to thicken it slightly with a roux (melt butter and mix with an equal part flour, cook for a minute, then add the milk and warm until thickened).
  •  You can either purée the soup in a blender or drastically improve your quality of living by investing in an immersion blender :), like this, for only around $30 (seeing all those cute colors makes me want another one haha).  If using a normal blender (or food processor), make sure to not to fill it more than half full and definitely allow the steam to escape (take the extra piece out of the center of the lid and top with a dish towel).
  • The reason I puréed the soup twice was because I wanted some chunks of broccoli left, but not any chunks of potato or onion or celery, etc.  If it seems like too much of a hassle (with an immersion blender it’s not at all, but with a normal blender it could be labor intensive), or if you prefer it very smooth and creamy, you could add the broccoli at the same time you add the potato and simmer it all together, then puree.

I calculated the nutrition facts for this soup, in each large serving (that is, if you assume you get 6 big servings out of this pot of soup), there are ~218 calories, 13 grams of fat, 5 grams of fiber and 11 grams of protein (not counting additional cheese for topping).  Not too shabby (especially compared to other broccoli cheddar soups I’ve seen that have over 500 calories in a serving!).  Plus each bowl had almost 100% of your daily value of Vitamin A and 200% of your Vitamin C!  Woot woot.

Cream of Broccoli Soup with Cheddar

Yield: 6 large servings Time: 50 minutes total (including at least 30 inactive)

  • 1 stalk celery, chopped
  • 1 small onion, chopped
  • 1 large or 2 small carrots, chopped
  • 1 clove garlic, chopped
  • 2 tablespoons butter
  • 3 cups stock or broth (chicken or vegetable)
  • 2 bay leaves
  • 1/4 teaspoon nutmeg
  • 1/4 to 1/2 teaspoon cayenne (depending how much of a kick you want)
  • 1 white potato, peeled and diced
  • 8 cups broccoli, roughly chopped (this was about 6 crowns for me)
  • 1 cup shredded cheddar cheese (plus more for serving)
  • 1/2 cup half and half
  • Salt and pepper
  • Real bacon bits (for topping, if desired)

Melt butter over medium heat in a large soup pot, and sauté celery, onion and carrot until tender, about 5 minutes.  Add garlic and sauté for 1 minute.

Add broth, bay leaves, nutmeg, cayenne, salt and pepper and diced potato.  Simmer, lightly covered, until potatoes are tender, about 15 minutes.

Discard the bay leaves and puree until smooth (either in a blender or with an immersion blender – see above).

Add in broccoli and 1 cup of water, and simmer (covered) 20 minutes, or until broccoli is tender.  Puree again, but not too much, leaving some chunks of broccoli (if desired).

Stir in cheese and half and half, until melted and combined.

Serve with more cheese on top … and possibly with bacon bits if you’re feeling indulgent ;-)

Did you know? Fixing Smelly Garlic Hands

21 Feb

Have you ever noticed how chopping garlic and onions can make your hands reek for hours?  I hate that!  I think I’m particularly paranoid about it, so the tip of the day is how to fix it!

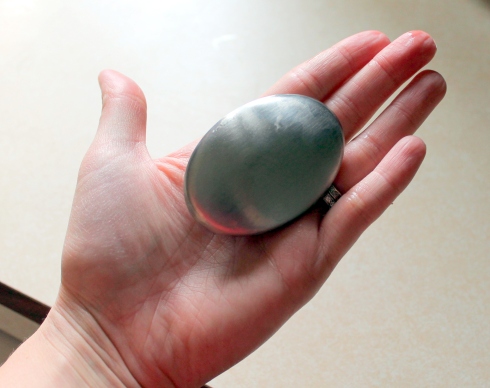
Just use one of these to wash your hands:

…It’s a stainless steel bar of soap!  They’re inexpensive, and when used like a normal bar of soap, completely eliminate odors from your hands.  They’re available at cooking stores or from Amazon (like this one).

If you don’t want to buy one like that, you can actually use any piece of stainless steel in your kitchen and just rub your hands against it (like your knife or sink faucet – just be careful with the knife option! ha).

Hooray for no more stinky garlic hands!  Now only if it worked for garlic breath…….. hmmm.

Black Forest Brownies

14 Feb

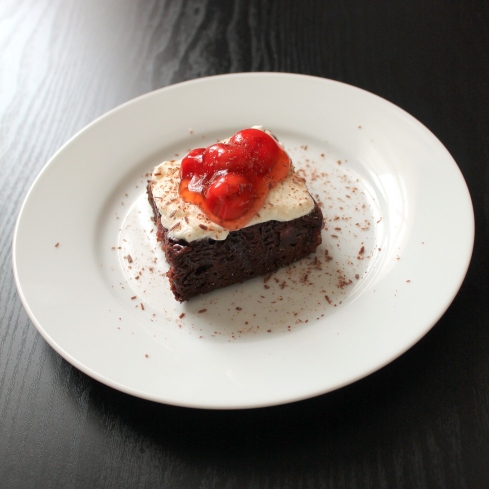
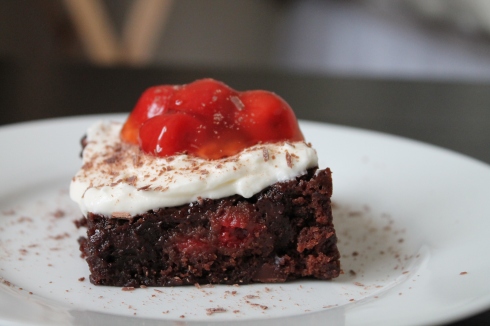
Valentine’s Day is here!  And what better way to celebrate than whipping up a special dessert for your loved ones?  Brownies are definitely one of my favorite desserts, and I thought, what could be better than Black Forest Cake?  Um, Black Forest brownies!  I love the cherry-chocolate combination, especially with the topping of a light cream cheese frosting.   I made up this recipe totally on a whim, not knowing how it would turn out, but Matt actually said this might be one of his favorite desserts ever.  That’s pretty monumental, and I’m pumped that they turned out so well!

Traditionally Black Forest cake is made with a whipped cream topping, so I wanted to combine that with a little bit of cream cheese frosting, and the result was DIVINE.  Like, probably this will be the cream cheese icing recipe I default on, because it had the lovely cream cheese flavor, without being so overly sweet and heavy.  It was light and delicious.

I like to cut the brownies and then spread the icing on, so I can do them “to order”.  If serving immediately for a crowd, feel free to spread them all and then cut them (though they may not turn out as clean looking).   I thought that they might get soggy if I frosted them all in advance and then didn’t eat them right away.  I just kept the frosting in a bowl in the refrigerator and spread it on a brownie as they are ready to be eaten.  Also, I like to store these brownies in the refrigerator because I thought they tasted better, and firmed up a little more, when kept chilled.

Black Forest Brownies

Time: 30 min. plus baking time  Yield: 16 brownies

  • 1 box brownie mix (I recommend Ghirardelli), plus eggs, oil and water for the mix
  • Chocolate chips (to add to the batter, if desired)
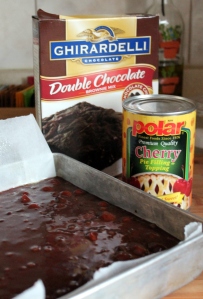
  • 2 cans cherry pie filling (16 ounces each) – I used Polar brand, which I had never heard of, but I liked that this brand did not contain high fructose corn syrup, just cherries and sugar, etc.
  • 1/2 cup heavy cream
  • 4 ounces reduced fat cream cheese, at room temperature
  • 1 cup confectioner’s sugar
  • 1 teaspoon vanilla
  • Chocolate shavings to garnish, if desired ;-)

Strain one can of the cherry pie filling to remove most of the liquid filling.  No need to rinse, just remove as much as possible so as to mix just the cherries into the brownie mix.

Prepare the brownies according to the package directions, stirring in the cherries from 1 can and chocolate chips (if desired)  immediately before pouring into a parchment-lined 9×9 baking pan. (Parchment lining allows you to remove the brownies from the pan as one unit, then you can cut them more easily on a cutting board).

Bake according to package directions.  Mine took slightly longer than the package instructions, possibly due to the increased moisture from the cherries.  So, you may want to extend the bake time by a few minutes if you notice they seem too wet when the time is up.  After baking, let the brownies cool completely in the pan.

Meanwhile, make the frosting.  In one bowl, whip the heavy cream with an electric mixer until it forms stiff peaks (when you pull the mixer out, the peaks on the mixer should stand up without flopping over).   In a separate bowl, beat the cream cheese, powdered sugar and vanilla until combined.  Gently fold the whipped cream into the cream cheese mixture.

Once brownies are cooled, cut into portions, then spread each with cream cheese topping.  Top each with some cherry pie filling, if desired.

Aquavit Bloody Marys

13 Feb

This year for Valentine’s Day, my gift to Matt was really a gift to both of us:  a bottle of Aquavit and homemade Bloody Marys.  A bottle of booze is the perfect Valentine’s gift for a guy, right?  Well it went over pretty well here!

What is Aquavit you ask?  Well, neither Matt nor I had ever heard of it until reading The Girl with the Dragoon Tattoo, which is based in Norway (awesome books by the way, and the movie was really great too!).  Aquavit is literally named the “water of life”; it’s a Scandinavian liquor made with any combination of flavors, most often caraway, fennel and anise.  Given the flavors, I’d heard it makes a mean Bloody Mary.   So, I thought I’d try it!  I used Krogstad brand Aquavit (which is made in Oregon, not Scandanavia, but it’s still good), and the bottle was ~$30.  I found it at a local artisan wine and liquor store, but I have a feeling that you would be able to find it in any large liquor store.

Matt and I both became kind of obsessed with Bloody Marys after having the amazing BBQ sauce- infused ones at VooDoo BBQ in New Orleans.  It was pretty much life-changing.   As you can see in the recipe below, I added a little bit of BBQ sauce to my mix, which was inspired by the one at VooDoo.  It might sound crazy, but it’s crazy delicious.  Just go light on the BBQ sauce to start, since it has a way of taking over the whole flavor.

Most of the ingredients in my recipe are pretty traditional in a Bloody Mary: vegetable juice (instead of tomato, because it has a little more depth of flavor), celery salt (always a must for me), Worcestershire (very classic), Tabasco (gotta have it), and black pepper.  Some of the others are a little more unusual: lemon and lime juice (they add a nice freshness and acidity), BBQ sauce (as discussed above) and steak sauce (if you have it, adds just a bit more of that savory Worcestershire/BBQ flavor).  And the real unusual ones are probably the horseradish and pickle juice.  I’ve seen horseradish in other recipes, and in this one it’s particularly good, since I am so partial to the combination of horseradish and caraway (which is the dominant Aquavit flavor), because I am from Buffalo, home of beef on weck.   The pickle juice might sound weird, but again, I kind of feel that anything pickled and salty will work well in a Bloody Mary.  It’s also a secret ingredient I like to use in things like cold tuna noodle pasta salad.  Mmm pickles.

With any of the included ingredients, it’s up to you what to include.  Above all, use this recipe as a guideline and adjust everything to your own taste.  Don’t go out and buy an entire bottle of steak sauce for just 1 tablespoon – make due with other things you have on hand.

Other things:  Aquavit has a very strong flavor.  If you are not into a super strong anise/caraway flavor, then use half Aquavit and half vodka.  Or, use all vodka (the pepper flavored vodkas that are in stores now would be awesome in this recipe).   Adjust the amount of liquor in each glass to your tasting – I recommend about a shot in each glass, but feel free to increase or decrease that amount.   And finally, if you can make it ahead, let the mix marinate in the fridge for a few hours to really let the flavors mingle and develop.

Aquavit Bloody Marys

Time: 20 min.  Yield: ~Eight 8-ounce servings

  • 46 ounces (1 bottle) low sodium V-8 vegetable juice
  • 2 tablespoons Worcestershire sauce
  • 1 tablespoon steak sauce
  • 1 scant tablespoon BBQ sauce
  • 4 tablespoons pickle juice (from a jar of dill pickles)
  • 1-2 teaspoons Tabasco (depending how spicy you like it)
  • 3 tablespoons each fresh lemon and lime juice (for me this was half a lemon and half a lime)
  • 1 tablespoon prepared horseradish
  • 1/2 teaspoon celery salt
  • 1/2 teaspoon black pepper (or more, to your liking)
  • Olives and celery stalks for garnish
  • 8 ounces Aquavit, or a mix of Aquavit and vodka

Combine all ingredients (except for alcohol) in a large pitcher, stirring to ensure everything is adequately dissolved, adjusting all ingredients to your own taste.  If desired, the mix can be made in advance (up to 24 hours) and stored in the refrigerator.

To serve, pour ~7 ounces of mix into a glass, add a 1-ounce shot of Aquavit to each, and stir with celery stalk to combine.

Spiced and Roasted Eggplant with Quinoa Salad

10 Feb

When I tore this Spiced Eggplant with Bulgar Salad recipe out of Bon Appetit magazine and told Matt that I wanted to make it, let’s just say he was more than a little bit skeptical.  Specifically, he told me to make it when he was out of town.  Ouch.

Well, I fully planned to make it when he was out of town (as I’ve said before, he prefers when his meals have some meat in them, plus I think he was hesitant about the eggplant); but, I got really busy and, long story short, he was home before I got around to making it.  Sorry Matt.

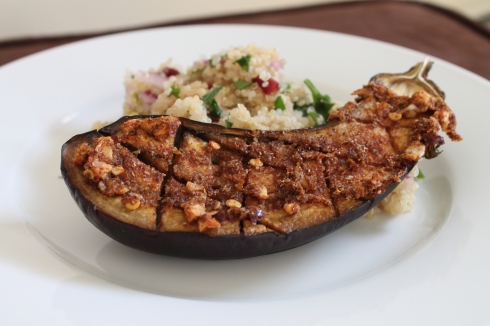
I don’t know what called out to me about this recipe, but it just looked like it was going to be so flavorful and like I wasn’t going to miss the meat.  I finally made it for lunch one day, and I must say both Matt and I were both very pleasantly surprised!  The eggplant was so spicy (not too hot spicy, but spicy as in it has lots of spices… haha) and flavorful, and the salad along side was delicious, even on its own.  With a dollop of Greek yogurt on top, let’s just say that I think this was actually crave-worthy.

The full-size eggplants in my store looked not-so-hot when I went shopping, so I opted for the smaller, mini ones.  For presentation, I thought these looked very nice, but I’m not sure I’d use them again in the future.  Perhaps I didn’t roast the eggplant quite long enough (I had to guess to adapt the cooking time to smaller eggplants), and therefore the flesh and skin weren’t really as tender as I would have liked.  I think in the future, even though it won’t look as impressive, I would make this again but with cubed pieces of eggplant, tossed in the spice mixture.  So if you use whole eggplant halves, definitely make sure to cook the eggplant long enough, until it’s very tender, so it’s easier to eat than mine!

This recipe also called for several ingredients that I couldn’t find (and/or didn’t want to buy for just one recipe), like preserved lemons and currants, or ingredients that I completely forgot, like the bulgar (forgot to buy it) and olives (forgot to add them! oops).   You can see the original recipe here, and my adapted recipe below:

Spiced Eggplant with Quinoa Salad adapted from Bon Appetit

Time: 30 min. active, 30-60 min. inactive , Yield: 4 servings

Eggplant:

  • 1/2 cup olive oil, divided, plus more for drizzling
  • 2 tablespoons lemon zest
  • 2 garlic cloves,  smashed
  • 2 teaspoons cumin
  • 1 teaspoon coriander
  • 1 teaspoon paprika
  • 3/4 teaspoon cinnamon
  • 1/2 teaspoon red pepper  flakes
  • 1/2 teaspoon kosher salt plus more
  • 4-6 small eggplants or 2 medium eggplants, halved lengthwise
  • Plain Greek yogurt for serving (about 1 cup)

Quinoa Salad:

  • 1 cup quinoa
  • 1/2 small red onion, very thinly  sliced
  • 1/3 cup dried cranberries, slightly chopped
  • 1/3 cup flat-leaf parsley, chopped
  • 1/3 cup fresh cilantro, chopped
  • 1/4 cup pistachios, lightly chopped
  • 2 tablespoons fresh lemon juice

Preheat the oven to 350°F.  Stir half the oil, all the spices, and a healthy pinch of salt together in a small bowl.  Score the flesh of each eggplant with diagonal crosshatches, being careful not to cut through the skin:

Drizzle the eggplant halves generously with olive oil and season with salt.  Spread the spice mixture evenly on all the halves:

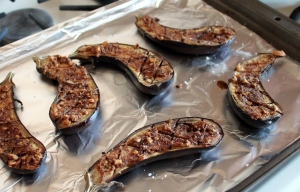
Roast until very tender, ~30-40 minutes for smaller eggplants or 50-60 minutes for regular sized eggplants:

Meanwhile, cook the quinoa according to the package directions.  Let cool, then stir in the remaining ingredients, plus salt and pepper.  Let the salad stand and the flavors mingle for at least 30 minutes.

Serve the eggplant atop the salad, with a dollop of yogurt.

Valentine’s Day Blondies

7 Feb

In honor of Valentine’s day, which is quickly approaching, and my little brothers coming to visit me, I wanted to make some festive blondies.  One would think that as such an extreme chocoholic, I would not condone blondies, which are basically like brownies, minus the chocolate.  However, I love them.  And they really remind me of one big chewy chocolate chip cookie.

These blondies turned out so buttery and had almost a butterscotch flavor, due to all the brown sugar in them.  They really tasted like Mrs. Fields cookies – YUM!  I may almost go so far as to say that they were slightly too butterscotchy, and next time I make them I might use half white sugar and half brown sugar (or maybe 3/4 brown, 1/4 white?).  Either way, I’m sure your family will love these!

I followed the basic recipe from Better Homes and Gardens, adapting it slightly to incorporate M&M’s and chocolate chips.  I also realized that I was almost out of all-purpose flour when I was just about to make these, so I used 1 cup self-rising flour and 1 cup all-purpose flour (the self rising flour elminated the need for the baking powder and baking soda, but I included the original measurements below because I’m sure most people have all purpose flour on hand).

Valentine’s Day Blondies recipe slightly modified from Better Homes and Gardens cookbook

Time: 20 min. active, 35 min. inactive, Yield: 9 x 13 pan – cut into as many as  you want!

  • 2/3 cup butter
  • 2 cups packed light brown sugar (or half brown, half white sugar)
  • 2 eggs
  • 2 teaspoons vanilla
  • 1 teaspoon baking powder
  • 1/4 teaspoon baking soda
  • Pinch of salt
  • 2 cups all-purpose flour (or 1 cup all-purpose and 1 cup self-rising, and eliminate the soda and powder)
  • 1 cup M&M’s
  • 1/2 cup semi-sweet chocolate chips

Preheat the oven to 350ºF.  Line a 13 x 9 baking pan with parchment paper (for easily removal and slicing of the bars), and spray with cooking spray.

Add butter and brown sugar to a medium saucepot and heat, stirring constantly, until butter and sugar are melted together and smooth:

Allow to cool for ~5 minutes (you don’t want to scramble the eggs in the next step, so this is important!).

Add the eggs to the sugar/butter mixture, one at a time, stirring until incorporated.  Stir in the vanilla.  Then stir in the flour/salt/baking powder/baking soda until combined.

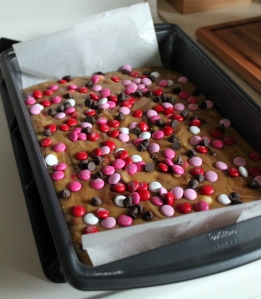
The mixture should be fairly cool by now.  Add in half the chocolate chips and some of the M&Ms (less than half).  Stir, and then pour the mixture into the baking pan.  Sprinkle the top with the remaining chips and M&Ms.

Bake until golden brown and a toothpick comes out clean, 25-30 minutes.  Cool in the pan on a metal rack for a few minutes then transfer the bar out of the pan onto the metal rack and cool more.

Slice when the bars are still slightly warm.

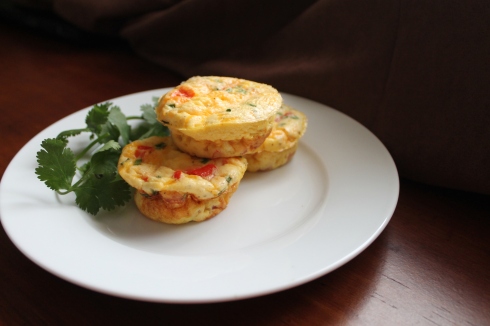
Muffin-Tin Egg Frittatas

3 Feb

Finding out I’m starting a new job next week has got me thinking about quick, yet satisfying breakfasts for on-the-go.  I am a breakfast person in general, and it needs to be a hot breakfast (cereal just doesn’t cut it for me – I’ll be hungry an hour later!).  Eggs are an obvious choice, but seeing as how I just found out I have to be at work at 8am (thus leaving the house at 6:30am to commute), I don’t think I’ll be waking up any earlier than I absolutely have to to cook eggs.

My solution is making mini egg frittatas, individually portioned using muffin tins, and keeping them in the freezer.  Then, I can reheat them in the microwave, just like these individual baked oatmeals.   Maybe I’ll even have one frittata and one oatmeal muffin each morning for a really complete breakfast :)

This recipe can be adapted in any way, shape or form you wish, with any ingredients you want.  I used half egg whites, half regular eggs, because adding a full 16 eggs somehow seemed excessive to me.  However, you can easily do this with all whole eggs.   If you want to incorporate more veggies, like bell pepper or onion or zucchini or broccoli or spinach…or…whatever, just make sure to saute them a bit first so they’re not too crunchy or watery in the finished frittatas.  Unless you like them crunchy.    Feel free to change up the type of cheese and/or the type of milk/cream (I used half-and-half and 1% milk, but you can use any combination you want).  It’s all up to you!  Just use whatever you have on hand.  I wrote some suggestions below for different combinations of ingredients, so have fun with it.

The recipe below yields 24 egg “muffins”, but feel free to cut it in half if desired.  You definitely want to fill the muffin tins pretty full before baking.  While in the oven, they rise (almost like mini soufflés), but as soon as you take them out of the oven they fall very quickly, and can end up being pretty flat.  Kind of like disks.  But I promise they’ll still taste good though even they might look a little funny.
Muffin-Tin Egg Frittatas

Yield: 24 “muffins”, Time: 25 min. active, 25 min. inactive

  • 8 whole eggs
  • 2 cups egg whites (or one 16-ounce container Egg Beaters egg whites)
  • 1/2 cup 1% milk
  • 1/2 cup half-and-half
  • 8 ounces ham, diced in small cubes (about 1 cup)
  • 1/2 cup red bell pepper, diced small
  • 1/2 cup shredded cheddar cheese, plus more for topping (if desired)
  • 1/2 cup freshly grated parmesan cheese
  • 2 tablespoons chives, chopped
  • Several grinds of fresh black pepper
  • 1/2 teaspoon salt

Preheat the oven to 350°F.  Coat 2 muffin tins with cooking spray.

Whisk together the eggs, egg whites, milk and half-and-half until well combined.  Meanwhile, saute the bell pepper (or any other veggies you use) briefly to soften.

Stir in the ham, cheeses, pepper and other remaining ingredients into the egg mixture.  The addition of freshly grated parmesan really adds a nice nutty flavor, so I highly encourage you to use real parmesan (read: not the stuff from the green can).  A block of real parmesan will keep a very long time in your refrigerator, and, since it has way more flavor, you can use less of it than the fake stuff.

Spoon mixture into each muffin tin well, filling at least 3/4 of the way full (the muffins rise like a soufflé, but then fall again, so no worry about over-filling).  Sprinkle with more cheese, if desired.

Bake for 20-25 minutes, or until set in the center.
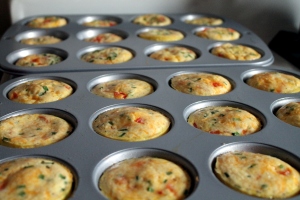
Remove from the oven  and flip onto a wire rack to cool (they will get lines on the top from the wire grating, but this ensures the bottoms are not soggy).

Cool for a few minutes, then either serve immediately, or flip over and cool completely on the wire rack, if freezing.

Freeze in gallon freezer bags or Tupperware.  Reheat in the microwave.   I reheat mine at 50% power for 40 seconds then 100% power for 10 seconds (lower heat will reduce the likelihood they get rubbery, but adjust times to your microwave and liking).

Here are some ideas for other combinations that would be tasty:

  • Spinach and feta (chop and saute spinach first)
  • Crumbled sausage, red peppers, and pepperjack cheese
  • Chopped cooked broccoli and cheddar
  • Sun-dried tomatoes and goat cheese
  • Bacon and… anything!

Braised Oxtail Ragù

2 Feb

There’s nothing like a slowly braised, rich, fall-off-the bone meat dish on a cold winter day.  Especially when you serve it over homemade pappardelle.  Too bad it hasn’t even been cold or wintery out!! (Who are we kidding, that is FINE by me!).  Regardless, I was in the mood for a wintery dish like this, and it turned out so delicious I would recommend it for any night of the year (preferably a weekend since this is a low-and-slow type recipe).

I had had a braised oxtail ragù dish recently at a local restaurant so I was anxious to try to make it myself at home, using this recipe from Osteria in Philadelphia, via Bon Appetit magazine.  Dishes like this at restaurants are so impressive, with such depth of flavor, but usually there are no fancy ingredients or techniques involved.  Just long and slow cooking to bring out the natural flavors.   And believe it or not, oxtail is not a hard-to-find ingredient.  I found it easily at my regular grocery store, which is not a gourmet store at all.

I wouldn’t call this a beginner-level recipe, but I wouldn’t say it’s advanced either.  All you have to do is read the directions and take the time to make it (it’s no 30 minute meal – so make it on the weekend!).  I highly suggest trying this recipe, even if you are intimidated – you and your friends will be very impressed, I promise!

The most labor-intensive part of this recipe was shredding the meat after it was cooked.  Oxtail has a lot of fat and cartilage and bone, which means there isn’t much meat.  Picking the meat off the bone takes time and a little patience, but it’s worth it.  Just make your kids (or husband) help you – men and kids don’t mind getting their hands messy, right?   If you can stand to wait, braising for longer than 2 hours may also help make this easier (just be sure that the liquid in the pot doesn’t over reduce – if so, add more broth).

Braised Oxtail Ragù recipe adapted from here

Yield: 4 servings at least (it is a very rich dish, you won’t be able to eat much!) Time: ~3.5 hours

  • 3 pounds oxtails (2-3″ pieces)
  • All purpose flour
  • 1/4 cup olive oil
  • 3 large celery stalks, coarsely chopped
  • 1 large carrot, peeled, chopped
  • 1/2 large onion, very coarsely chopped
  • 1 cup dry red wine
  • 3/4 cups canned crushed tomatoes with added puree
  • 2 garlic cloves, chopped
  • 3 fresh Italian parsley sprigs
  • 1 large fresh rosemary sprig
  • 2 bay leaves
  • 2 cups beef broth

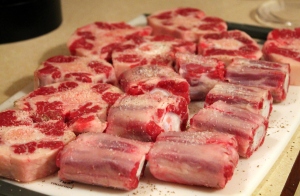
Preheat oven to 325°F.  Sprinkle oxtails with salt and pepper:

Then coat them in flour. Heat oil in heavy wide ovenproof pot over high heat.  Add oxtails;  cook until brown on all sides, about 15 minutes.  Transfer to bowl.

Add celery,  carrots, and onion to pot.  Reduce heat to medium-high and sauté until vegetables brown, about 15 minutes. Add wine and tomatoes. Boil until thickened to chunky  sauce, about 5 minutes. Sprinkle in garlic. Tie parsley, rosemary, and bay  leaves with kitchen string and add to pot.  Return oxtails to pot in single  layer (or as close to that as you can).  Add all broth; bring to boil.  Cover pot; place in oven.

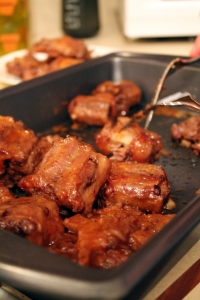
Braise oxtails until very tender, about 2 hours.

Transfer oxtails to rimmed baking sheet.  Pull meat off oxtails, avoiding large pieces of fat and bone. Set aside.

Using potato masher, crush juices and vegetables  in pot to make a coarse sauce.

Add meat back to pot and season ragù with  salt and pepper.   Serve over gnocchi or homemade pappardelle.  Garnish with fresh parsley and shaved parmesan.